


SkyRadar has completely reworked FreeScopes for the PSR base module to respond on NextGen requirements of ATC qualification programs (ATCO & ATSEP), as well as University Education (education, exercises, research). Flexibel panels for scope and filter applications per scope (!!!) boost FreeScopes light-years ahead of any other tool in the market.
This document refers to the FreeScopes software of the releases 6.x for the PSR radar.
The results produced by the PSR are now much more precise than in the previous versions of PSR due to a better data conversion and refinement. Customers with the old FreeScope software are invited to contact us for an update.
Operating Manual
General Conception
The user interface of the SkyRadar Base Unit can be operated locally through wireless LAN, and with the help of the SkyRadar Cloud server through an Intranet (e.g. University or Academy Intranet) and the Internet. In the following document we refer to it as FreeScopes Online Radar GUI. It is possible for multiple users to manipulate the radar raw data and operate different Scopes or filters concurrently. The number of users is just limited by the capacity of the Cloud Server and the legal agreements between the customer and SkyRadar.
The unique advantage of FreeScopes: It is possible for multiple users to manipulate the radar raw data and operate different Scopes or filters concurrently. The number of users is only limited by the capacity of the Cloud Server (1000+ concurrent users) and the legal agreements between the customer and SkyRadar.
FreeScopes has been developed to look similar to an operational radar, but we added additional controls for calibration, additional filtering etc.
This will help ATCOs and students to understanding the implication of key radar parameters such as bandwidth. But it will also help ATSEPs to learn how to debug a radar and better understand causes of decalibration - and rapid recovery.
NOTE: The software has been completely reengineered as compared to the previous versions for enhanced user experience and learning outcomes.
In addition to FreeScopes, the user can directly access the raw data (IQ-data) in JSON format for comfortable connection with MATLAB. Contact us for a Basic MATLAB client (exe) which can be extended by the students. Also the raw data can be supplied to a PC- or serverlocated client, exporting ADS-B data format. This allows to insert the data directly into any modular and standardized ATC system (potential API-adaptations may be required).
This document introduces into FreeScopes in the following steps:
- Start-up and Configuration for System Admin of Lecturers
- Start-up for Students
- Handling the Scopes
- Super-Users
- How to Choose the Right Computers for the SkyRadar Lab
Start-up and Configuration for System Admin or Lecturers (Superusers)
We have two alternative configurations: Standalone or CloudServer. When we work without CloudServer, we connect to the Wifi "SkyRadar PSR" or "SkyRadar FMCW".
The configurations are defined with the Wifi Dongles. It we want to operate in standalone mode, we have to use the dongle, which is labelled "Stand-alone". If we work with the CloudServer, use the Dongle with the Label "CloudServer". The CloudServer is directly connected to the Router.
When we work with the CloudServer, the Wifi network is called "SkyRadar CloudServer".
The user will need to connect to the internal address "freescopes.net". For that, just type freescopes.net into the browser address-bar. Ideally the system admin prepares a pre-configured browser ICON on each student desktop.
By just turning on the SkyRadar PSR, FMCW or NextGen Pulse device, connecting to its WIFI and opening its web interface in web browser we will see this start page.
If you connect to FMCW through SkyRadar Cloud Server use this internal address: "freescopes.net".
You can bookmark this address or create a shortcut on the students' desktops for ease of access.

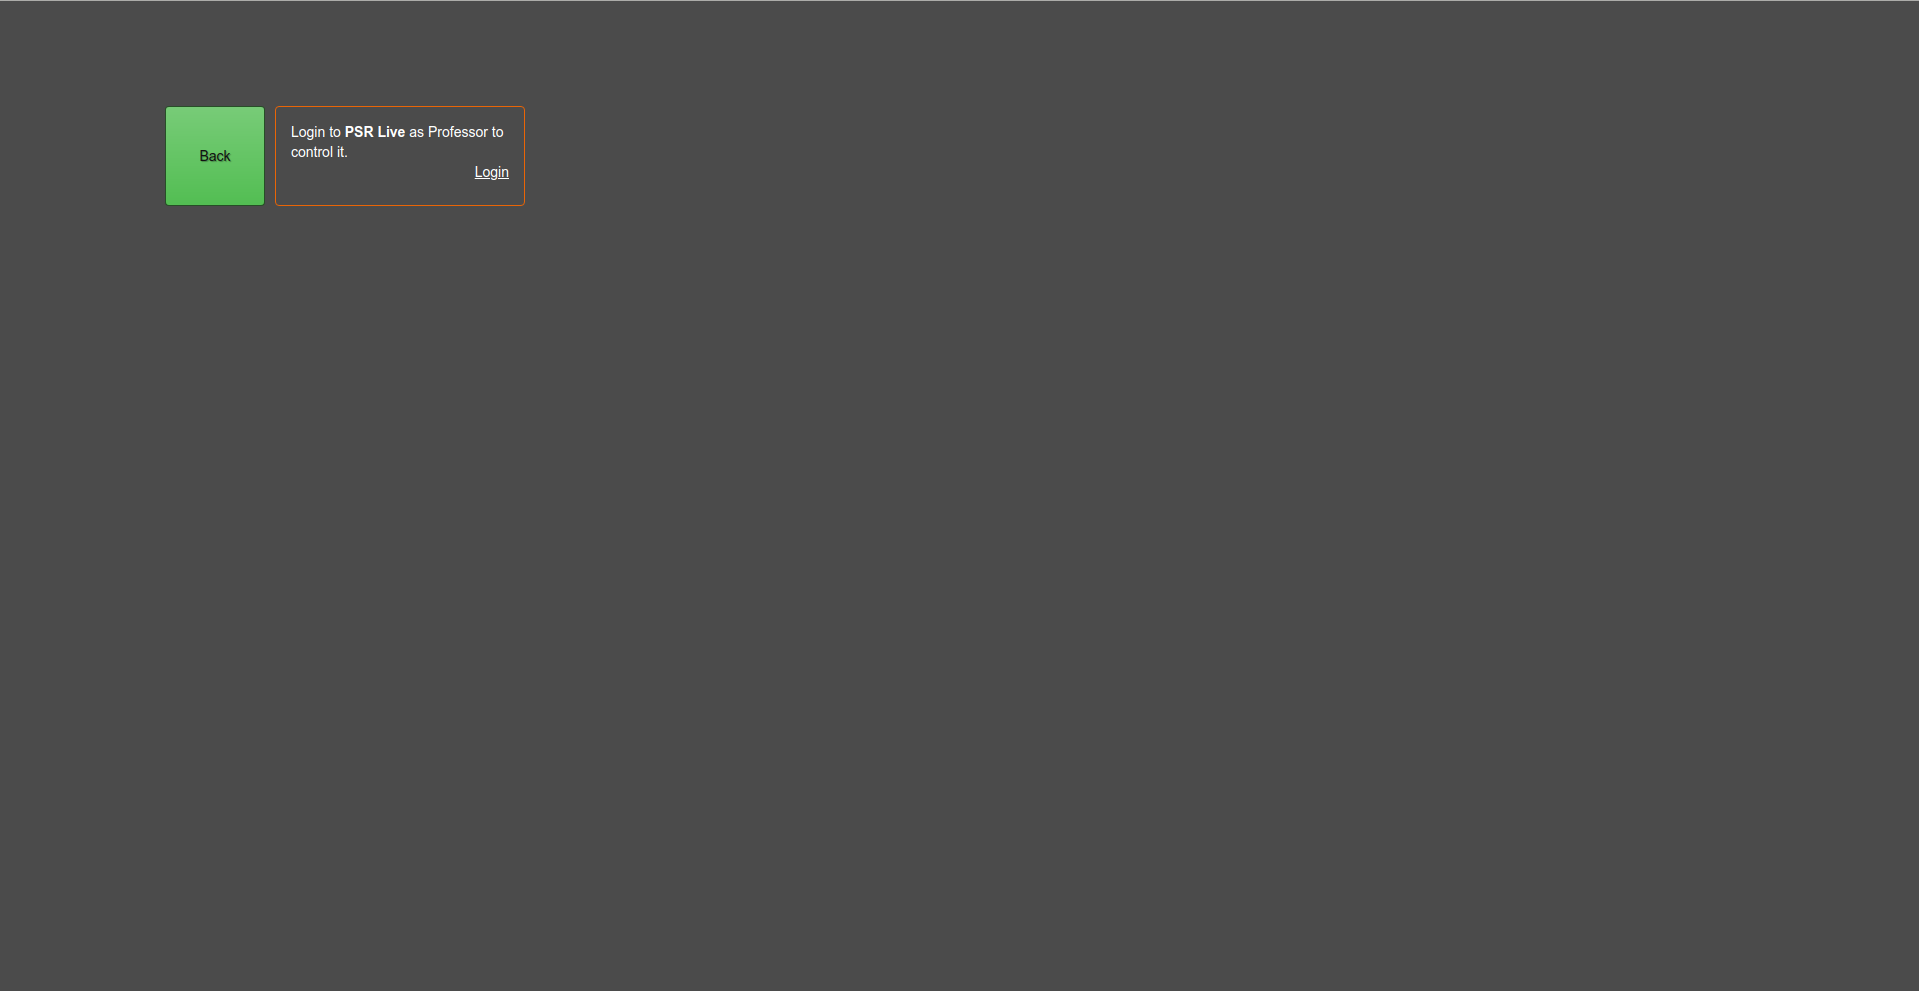
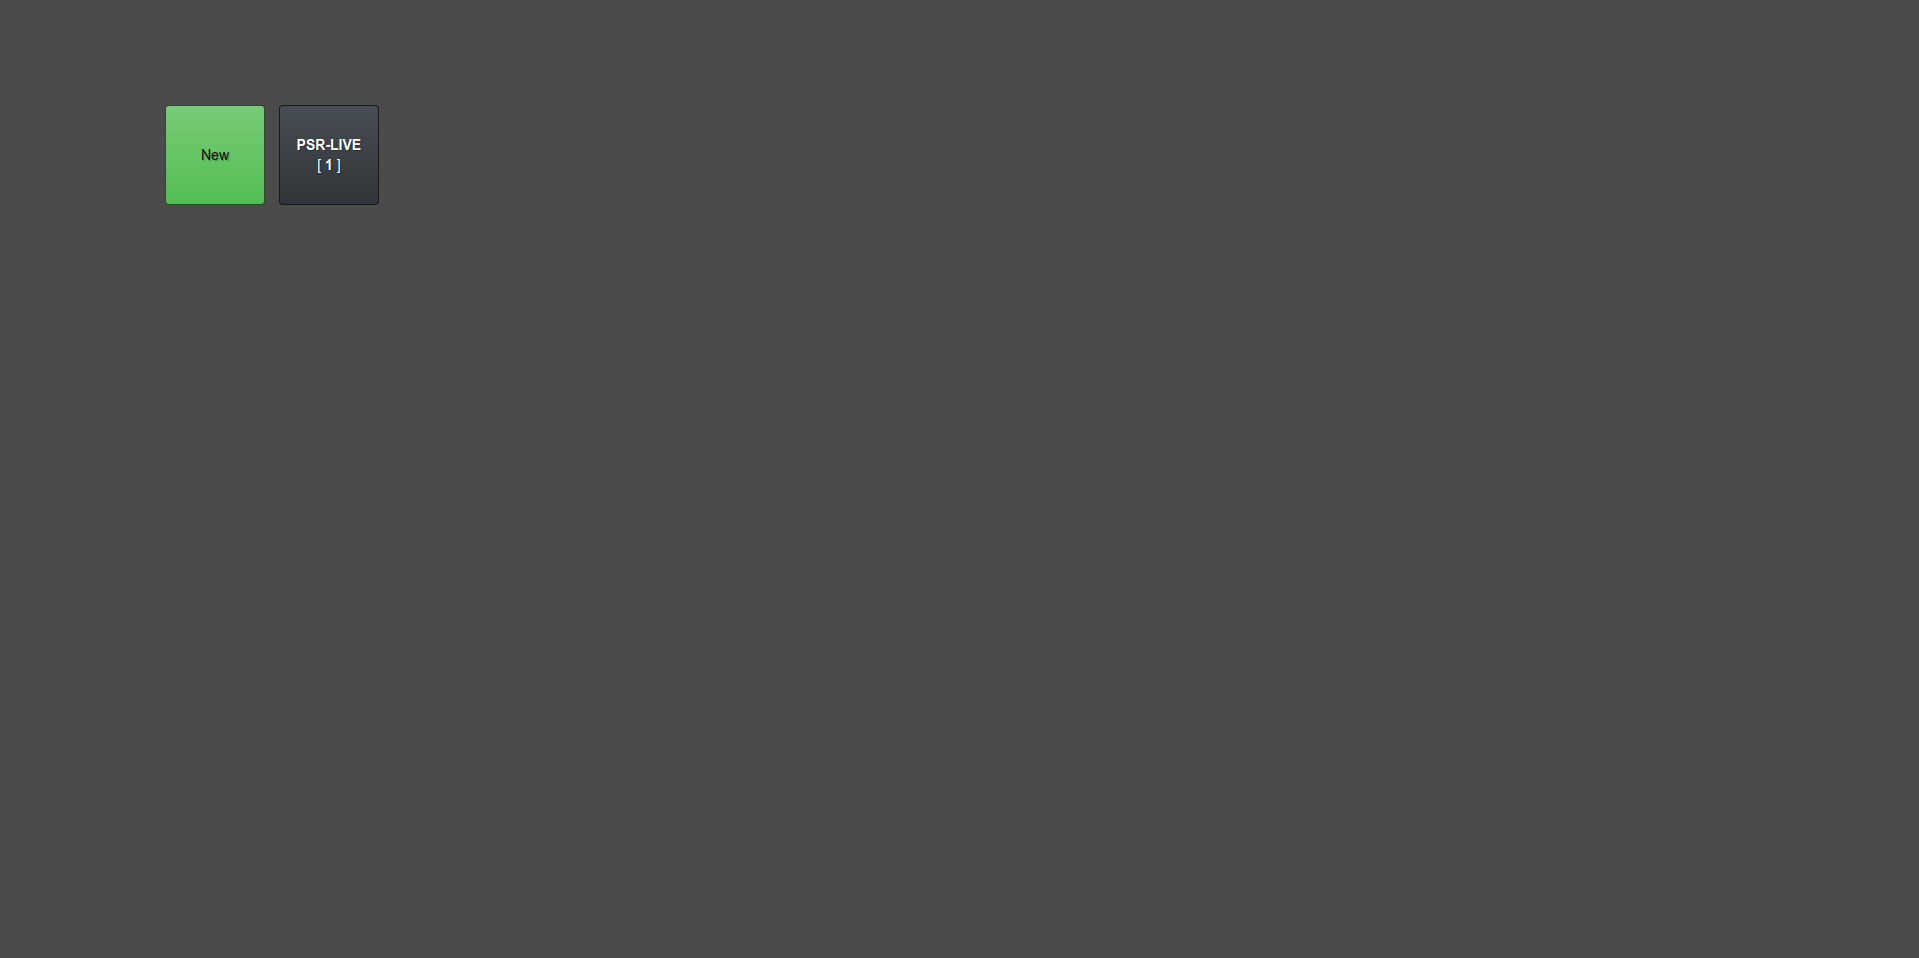
When you try to connect to PSR you will see a green button with a New label.
By clicking on it you will see the next panel:
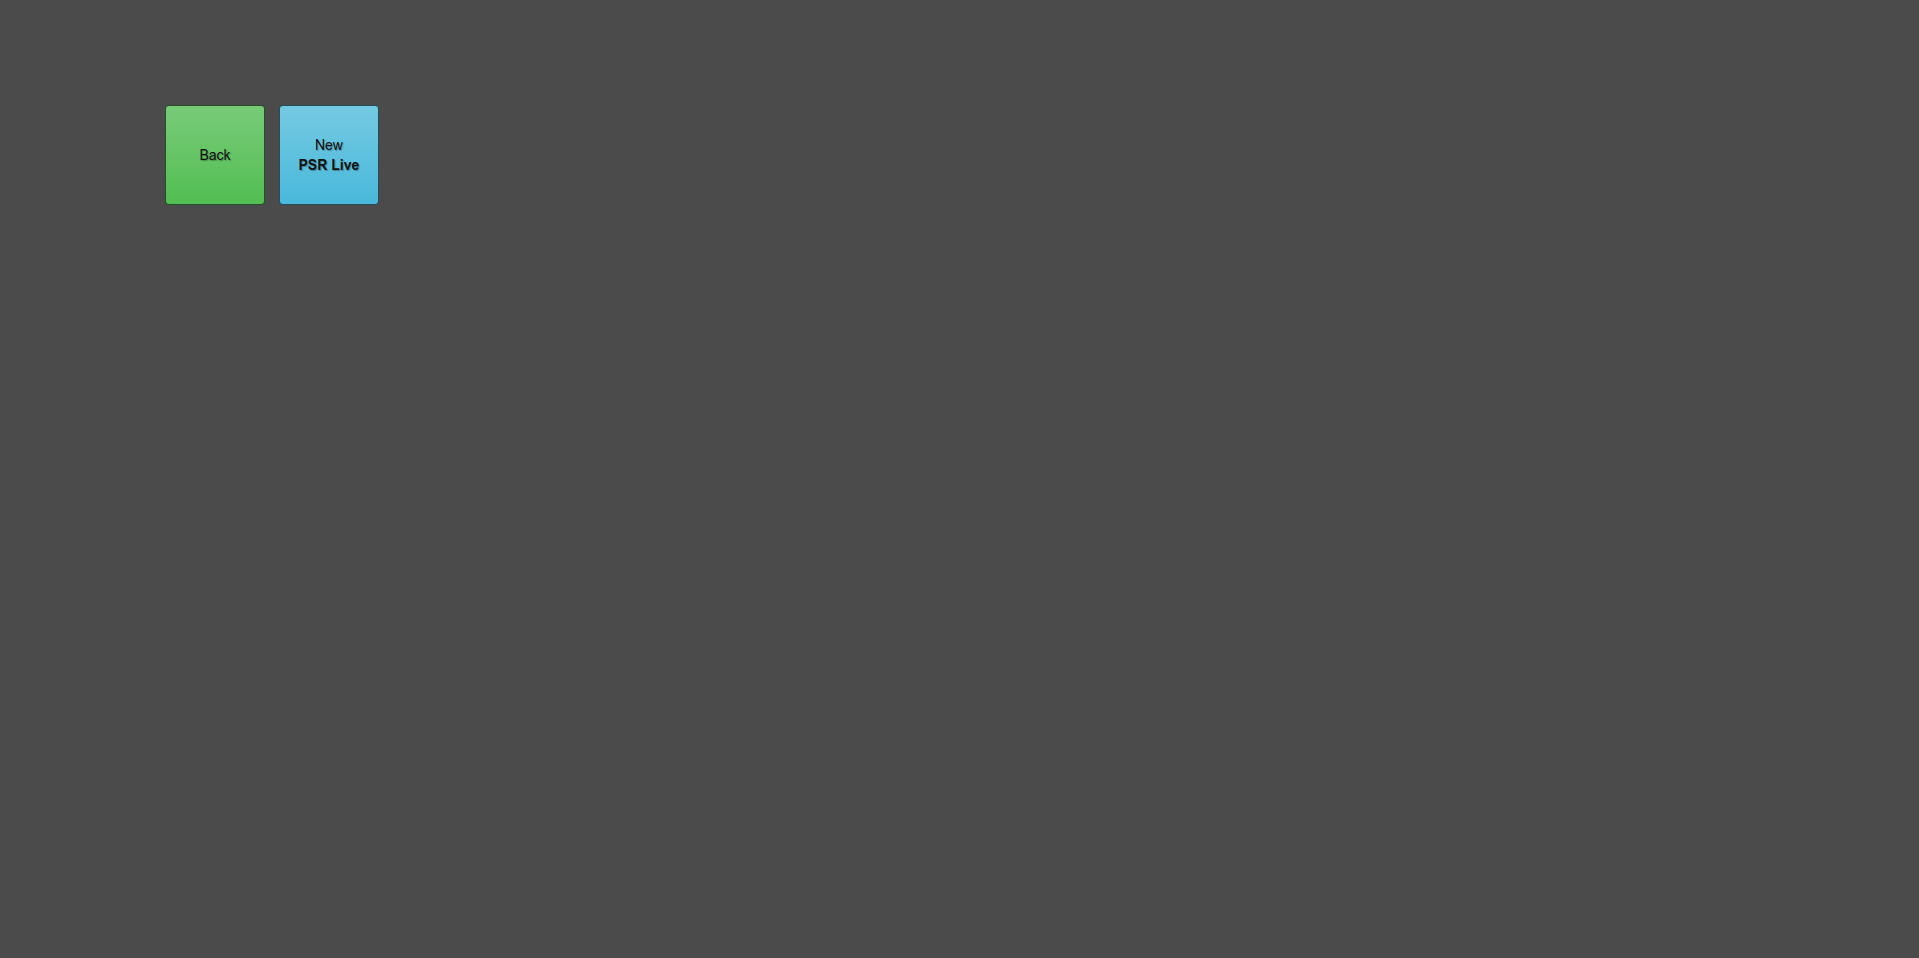
A blue button shows "New PSR Live".
The Professor can use this button to start sending PSR data stream to all students.
A superuser (professor) will start a new hardware controlling panel. If there are more training devices like SkyRadar PSR, SkyRadar SAR, etc, more choices will appear.
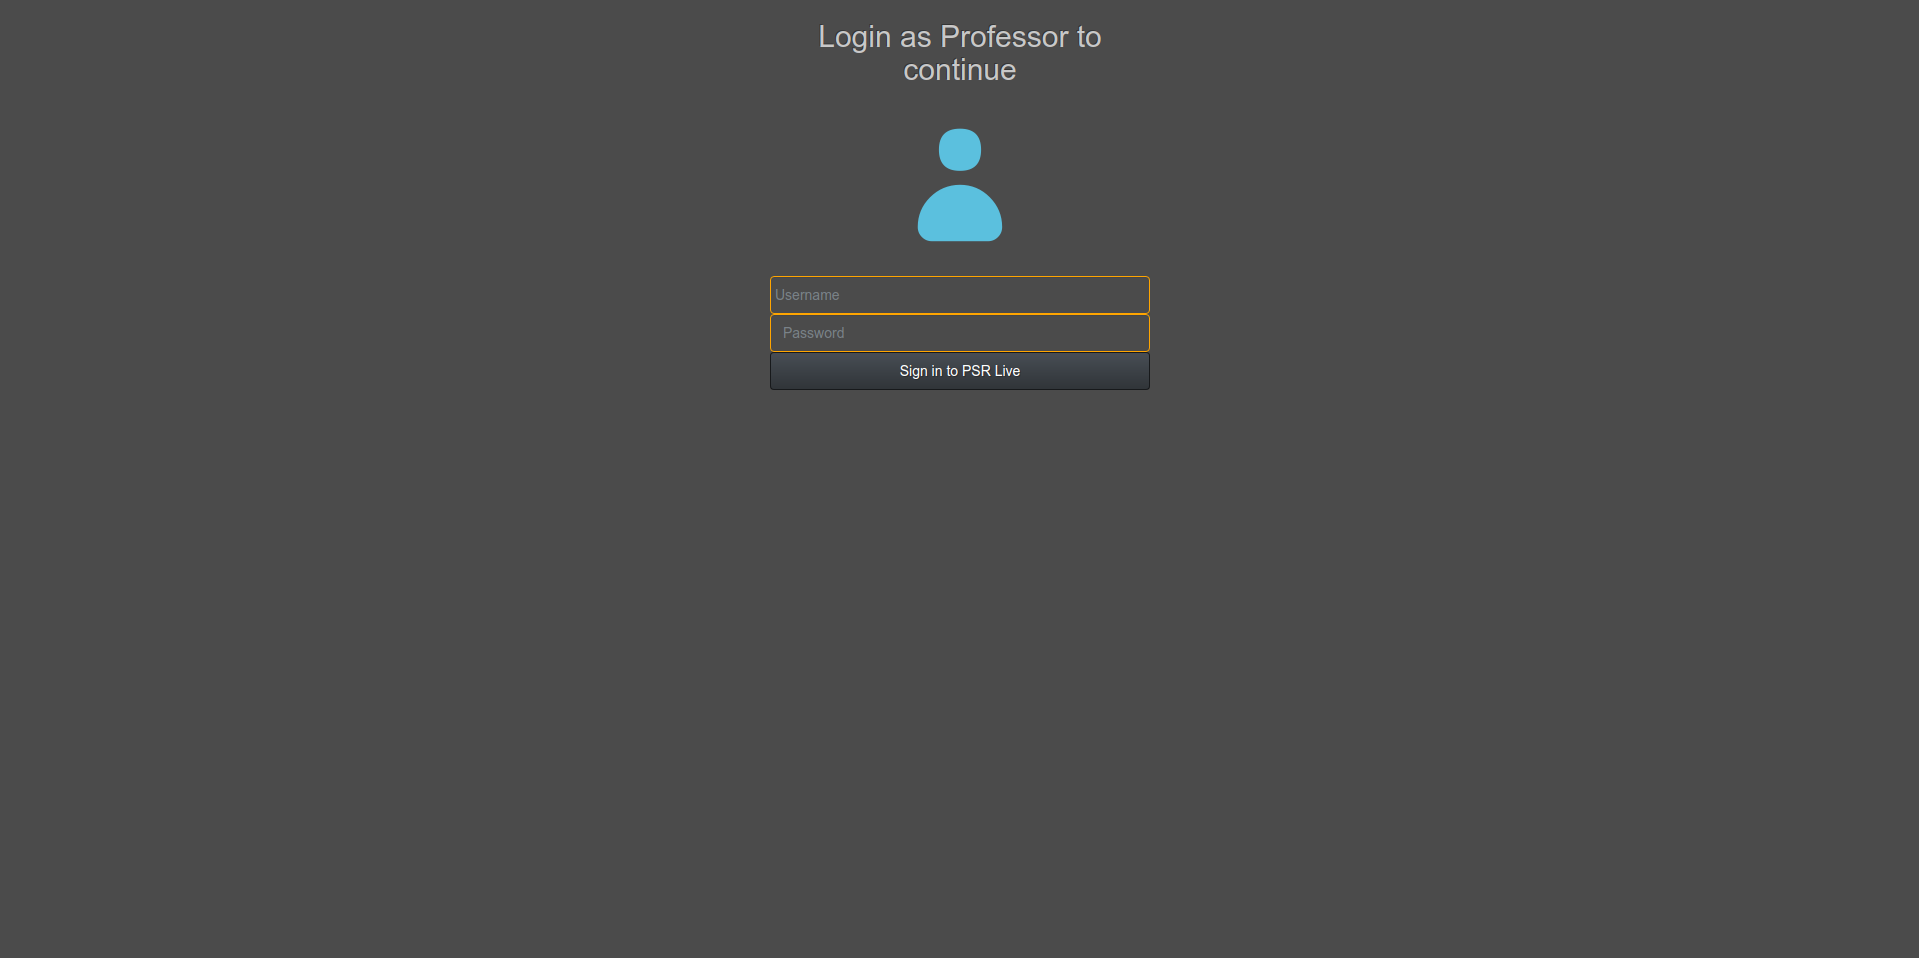
The Superuser needs a username and password to start hardware controlling. By default both of username and password are a single hyphen (-). The superuser can reset it.
After login a control panel will appear.
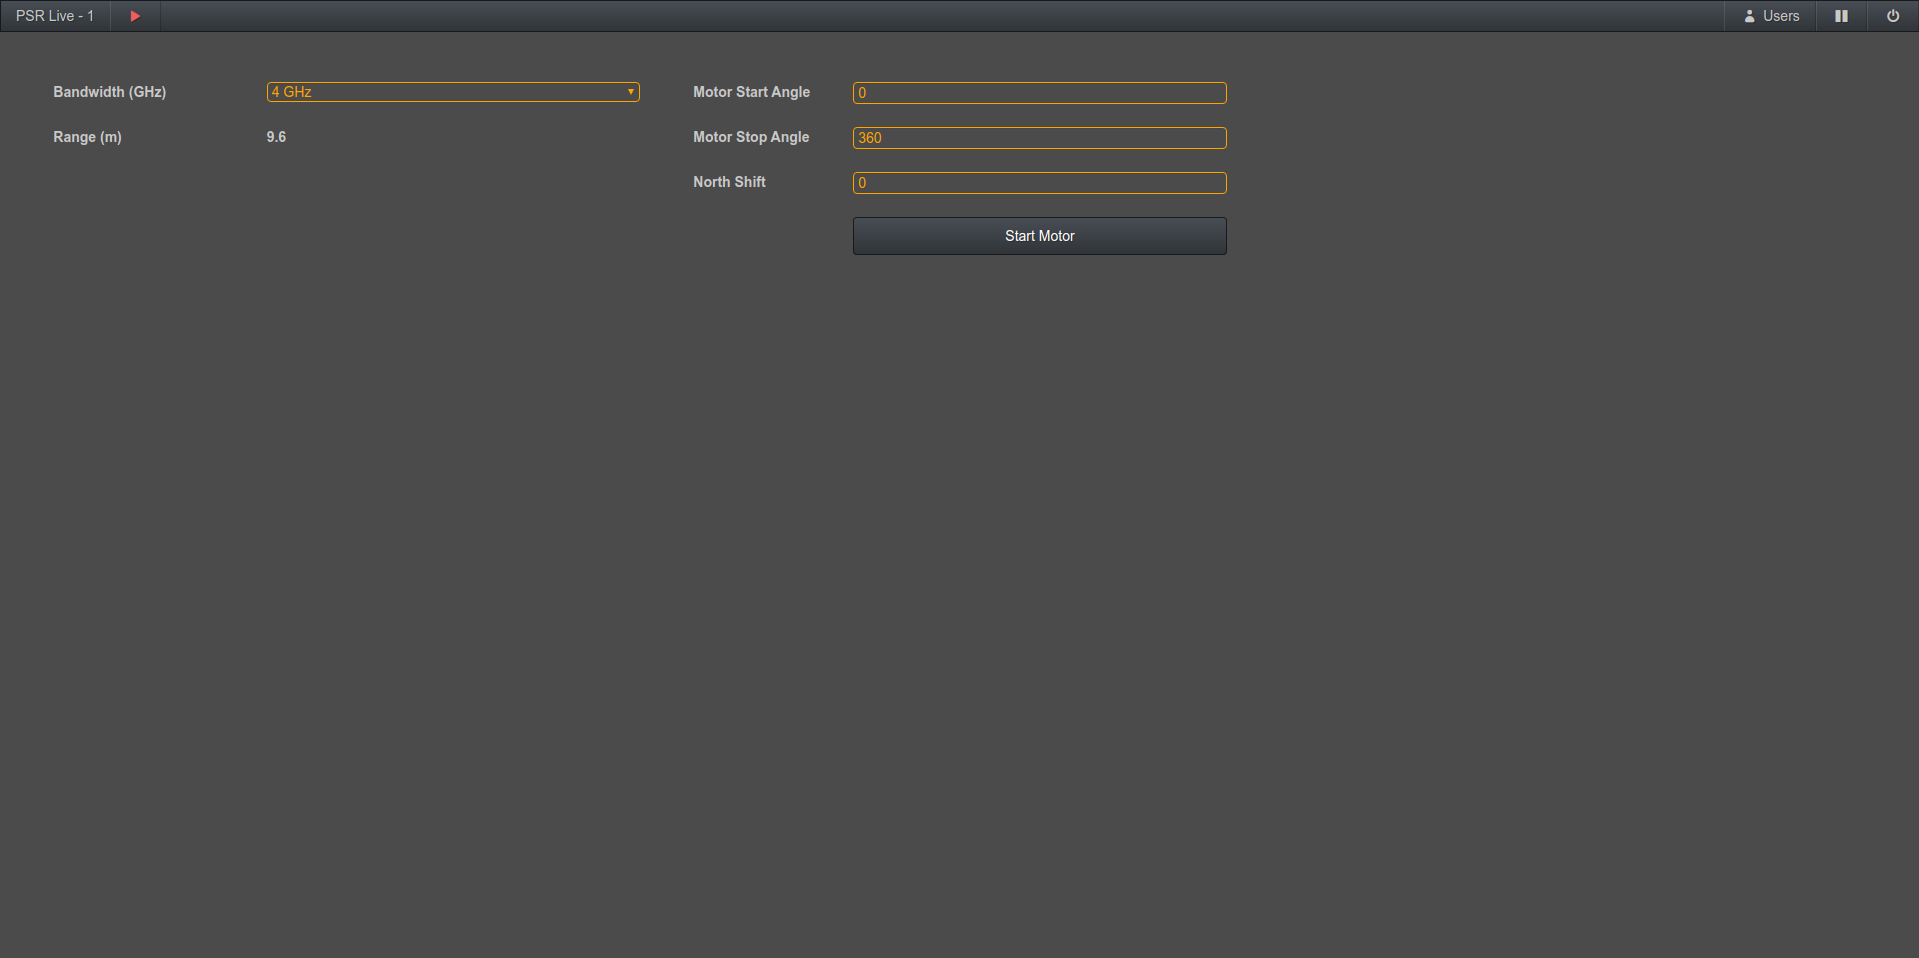
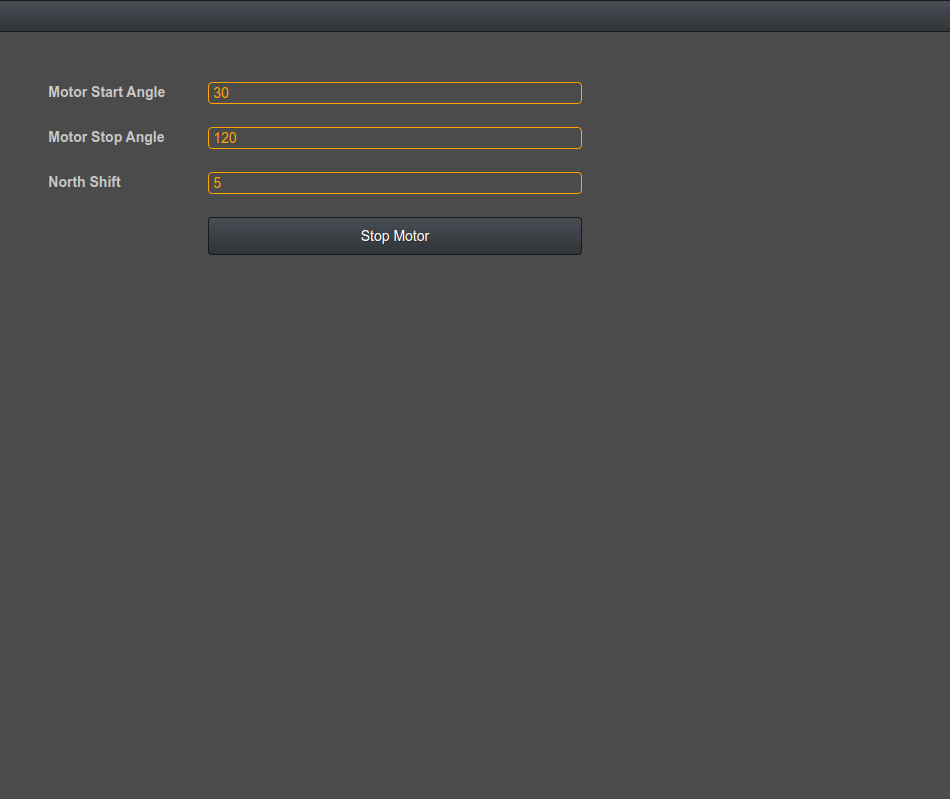
Once logged in, the professor is able to control the motor or the bandwidth of radar: from 1 GHz to 4 GHz.
Superuser is able to control the motor, that it's effect easily visible in PPI-Scope for user.
Learn more about controlling the radar hardware in the chapter:
Superusers - Controlling the Radar-Hardware
Start-up for Students
After the professor started PSR, student are able to connect to it by same address in browser: freescopes.net
The students should connect to the available SkyRadar wifi (depending on the configuration)
But this time a new gray button is added beside New button. It means a PSR-Live data stream is already available and by clicking on it, PSR device start sending data to the student computer.
Student interface will change to a new empty board. This board is empty just the first time student connect to PSR. Next times it will load based on last student's configuration panels.
NOTE: the number of concurrent radars and simulators (PSR, FMCW, PSR-SSR-Simulator, etc), connected to the FreeScopes software is not limited. All different applications can be accessed through the same front-end. The screen will auto-adapt on the requirements of the specific application.
Handling the Scopes
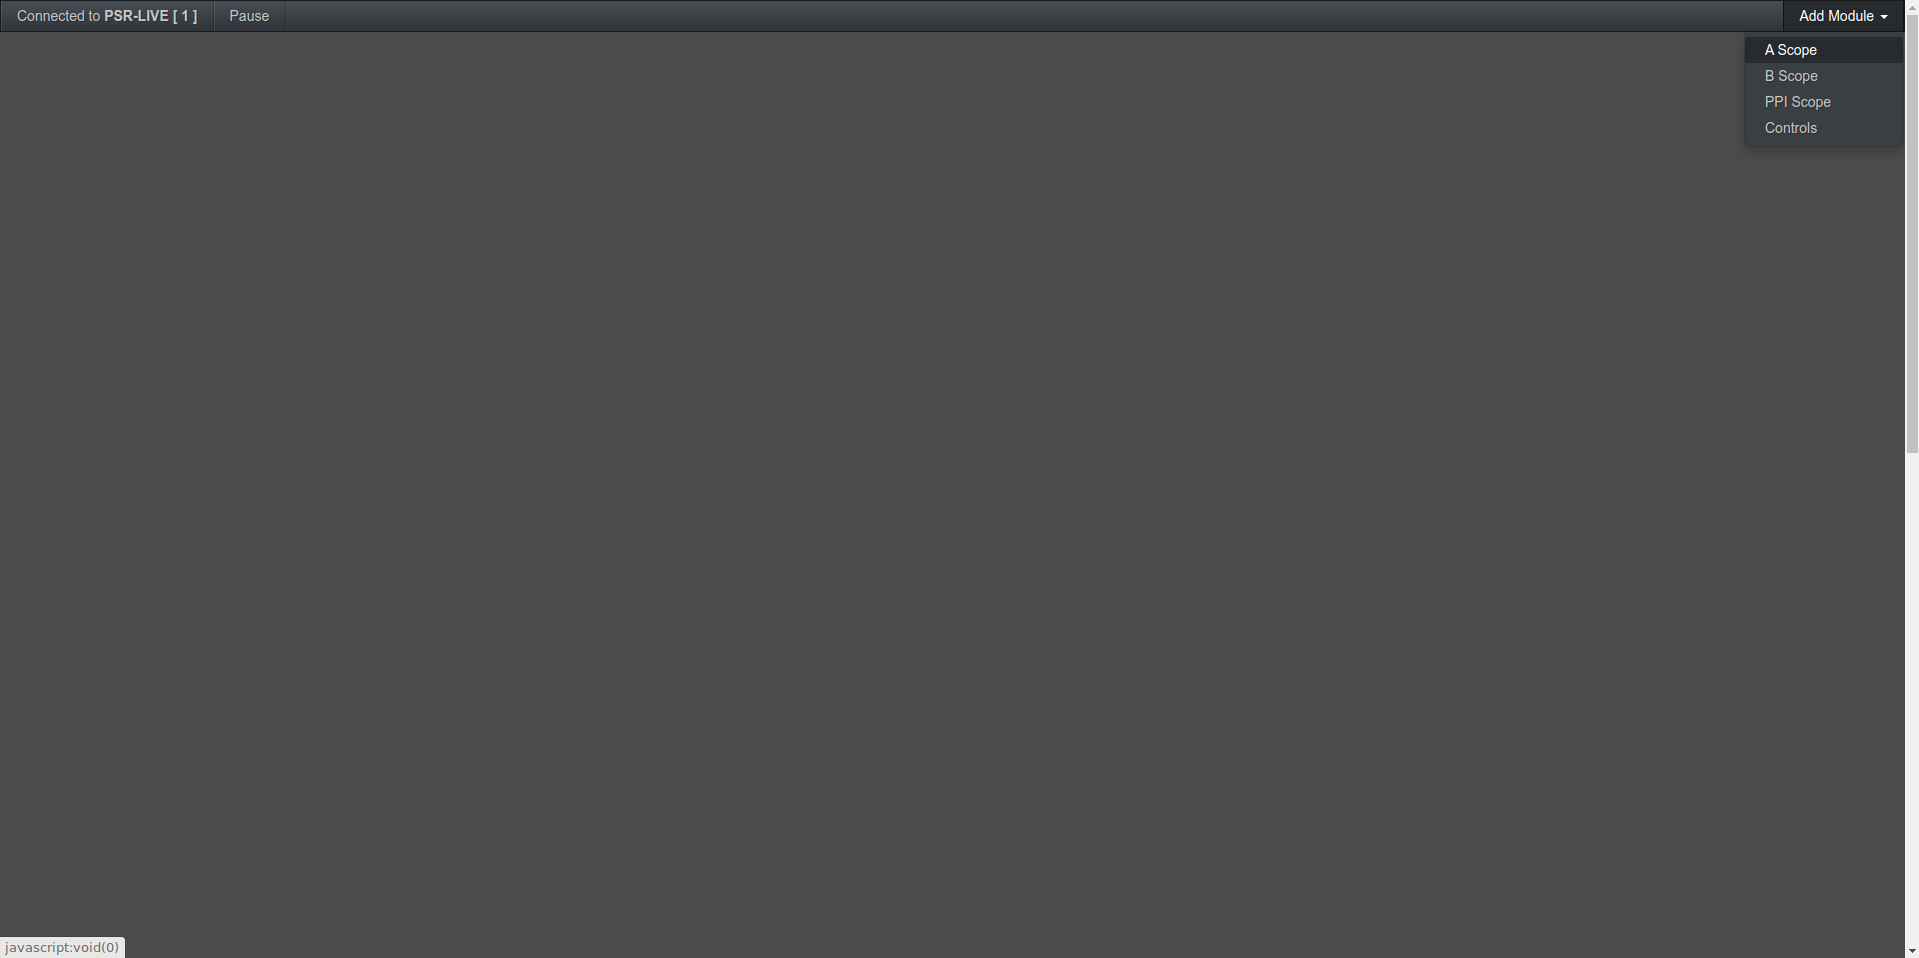
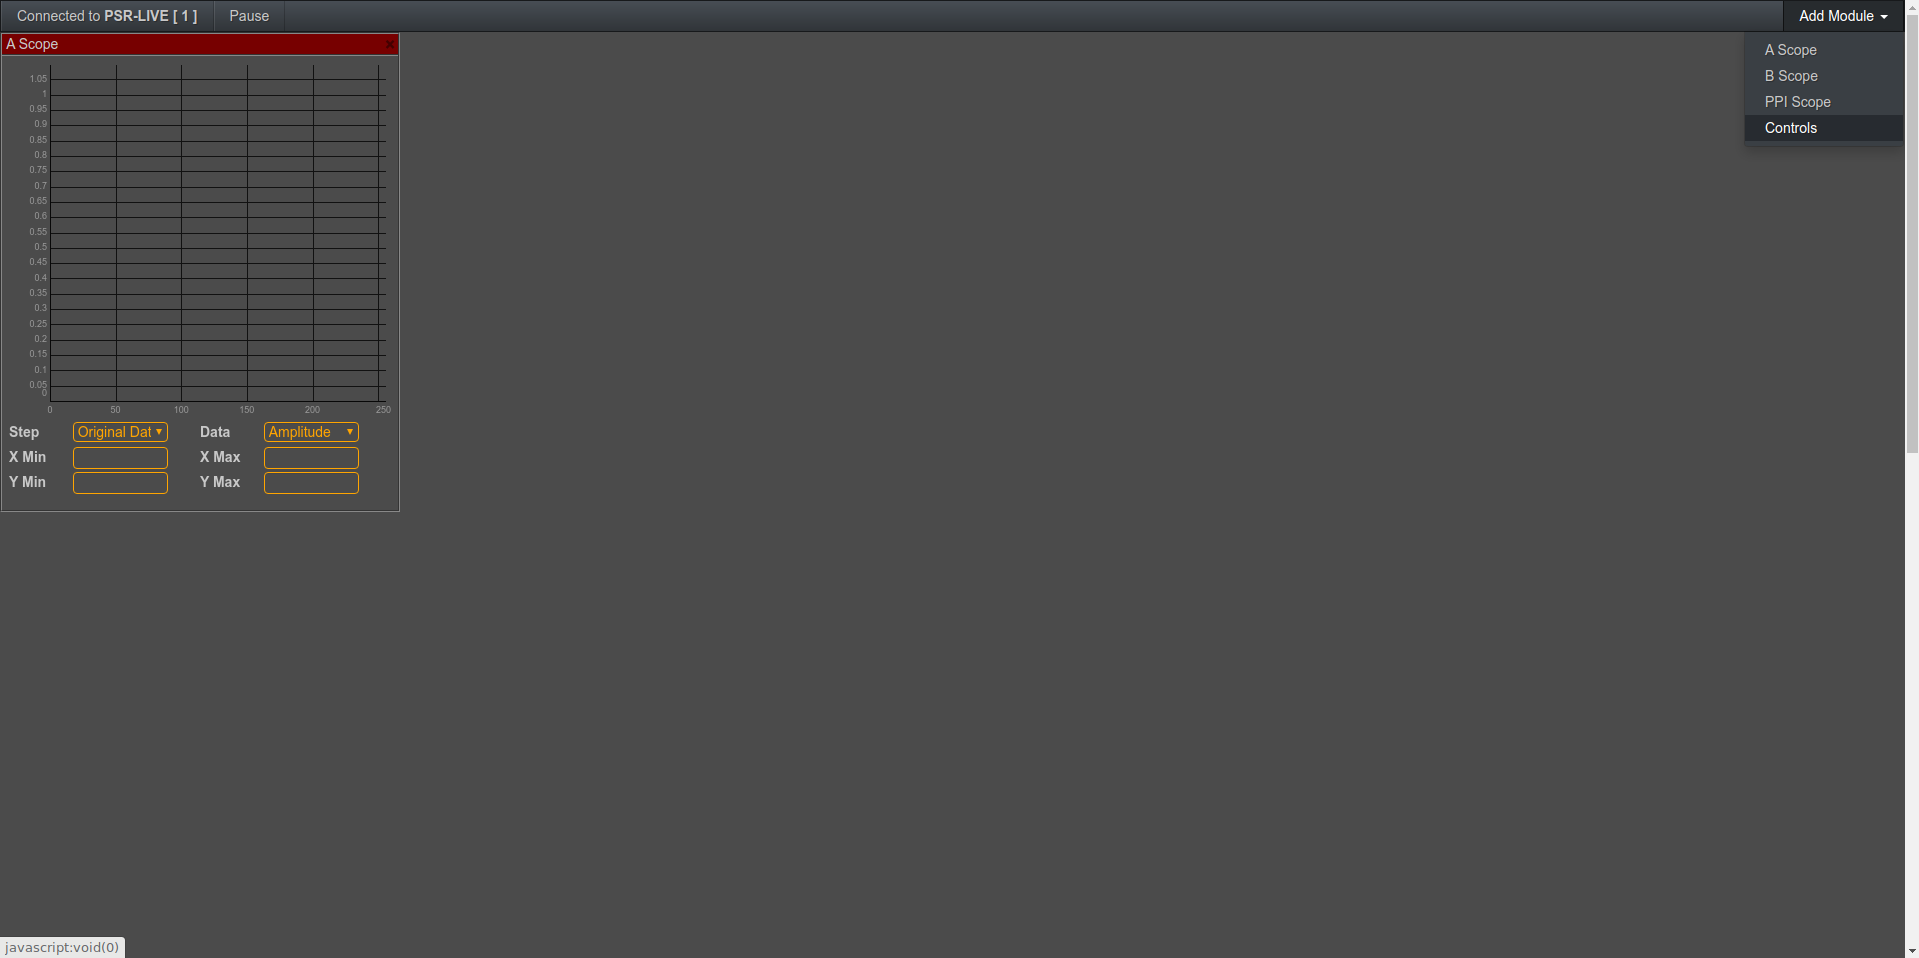
There is a menu at top right corner. The student should use it to add different modules to his or her empty board. Let start by adding a new A-Scope.
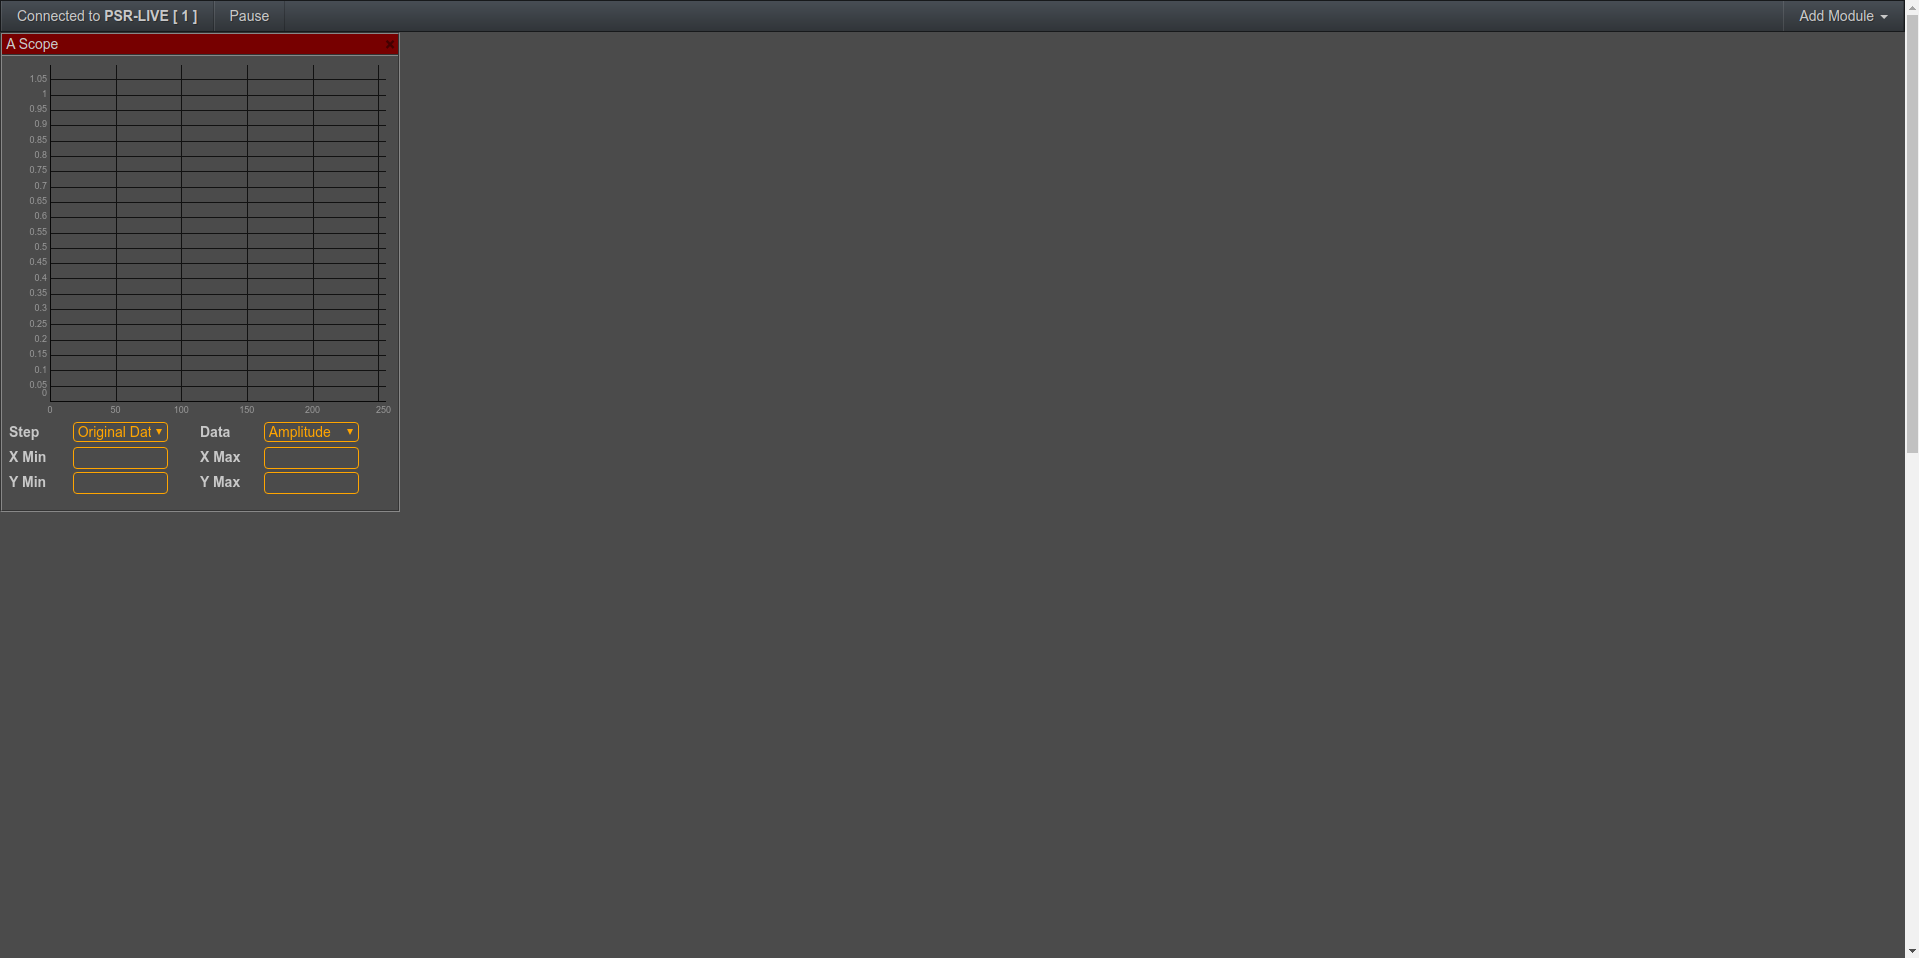
By clicking on A-Scope in Add Module menu a new A-Scope panel will appear in board. But there is no data yet.
To process received data from PSR and show it in A-Scope a Control module is needed. We can add it from New Module menu.
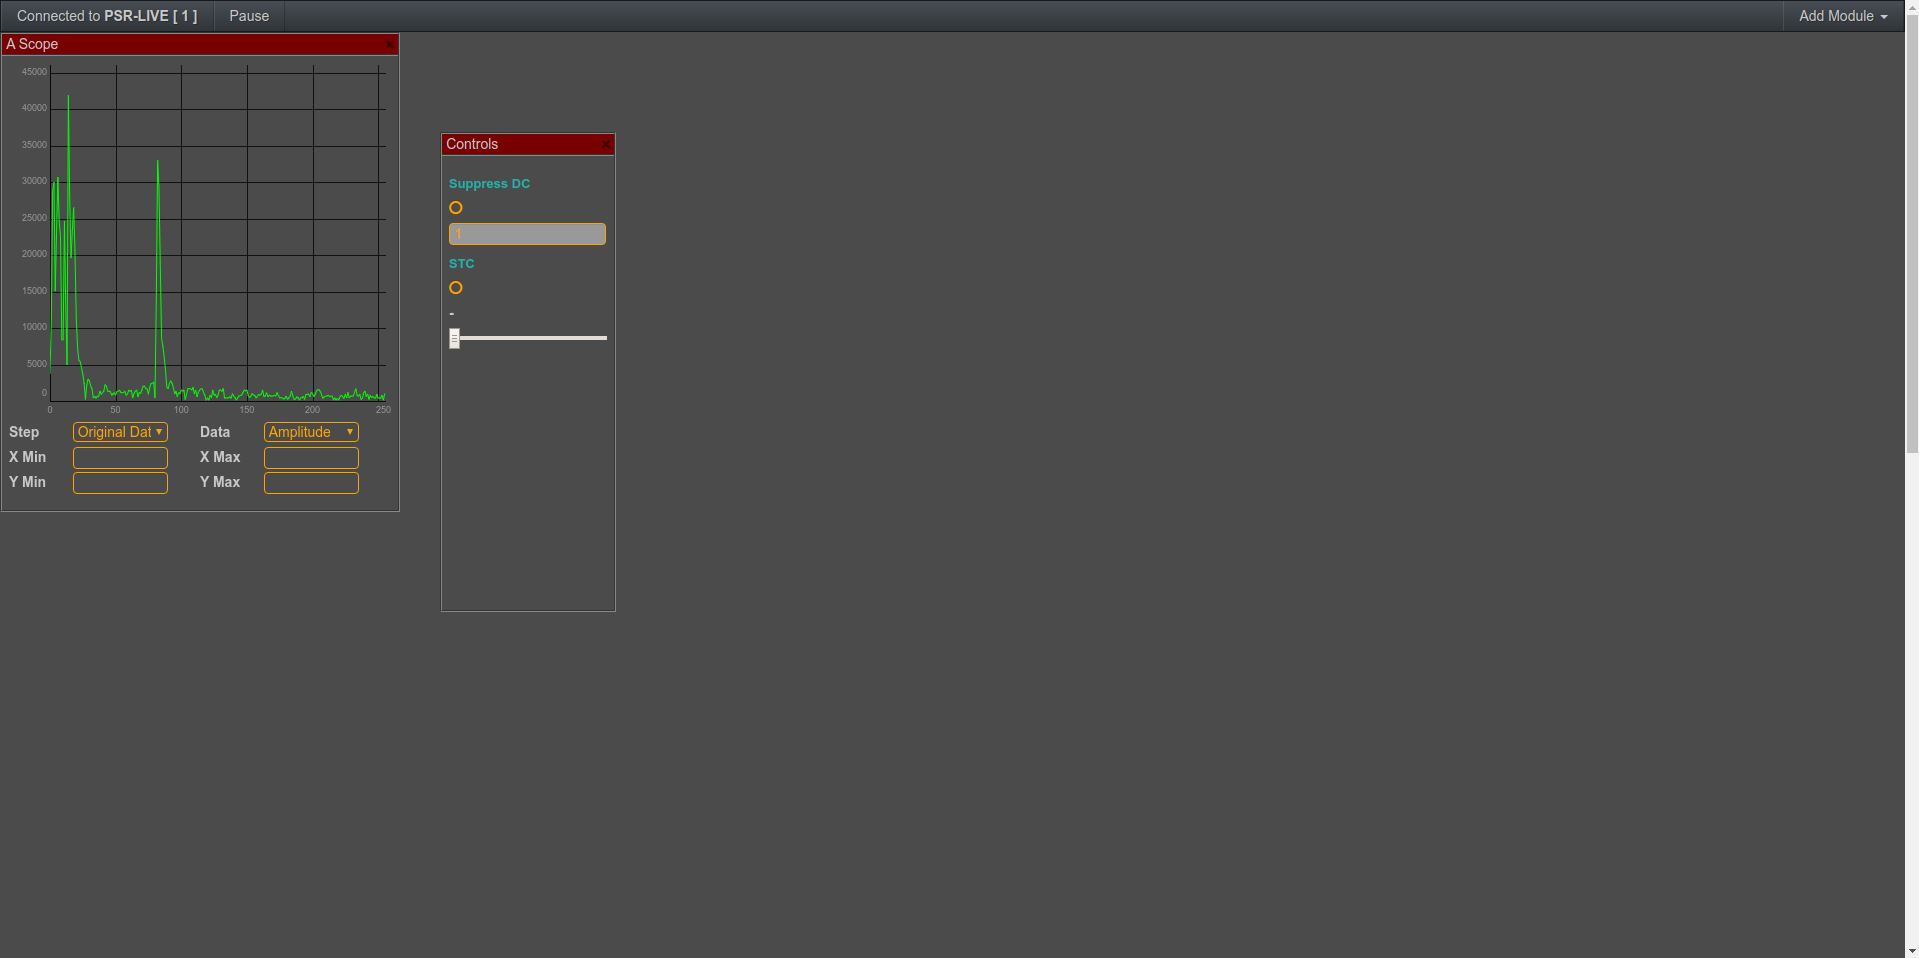
By adding Controls module, A-Scope will start receiving data.
A-Scope: Arranging the working environment
You can adjust size and position of panels by dragging or resizing them. Here we resized A-Scope and also move th Controls to the right side of board.
I-Data and Q-Data in the A-Scope
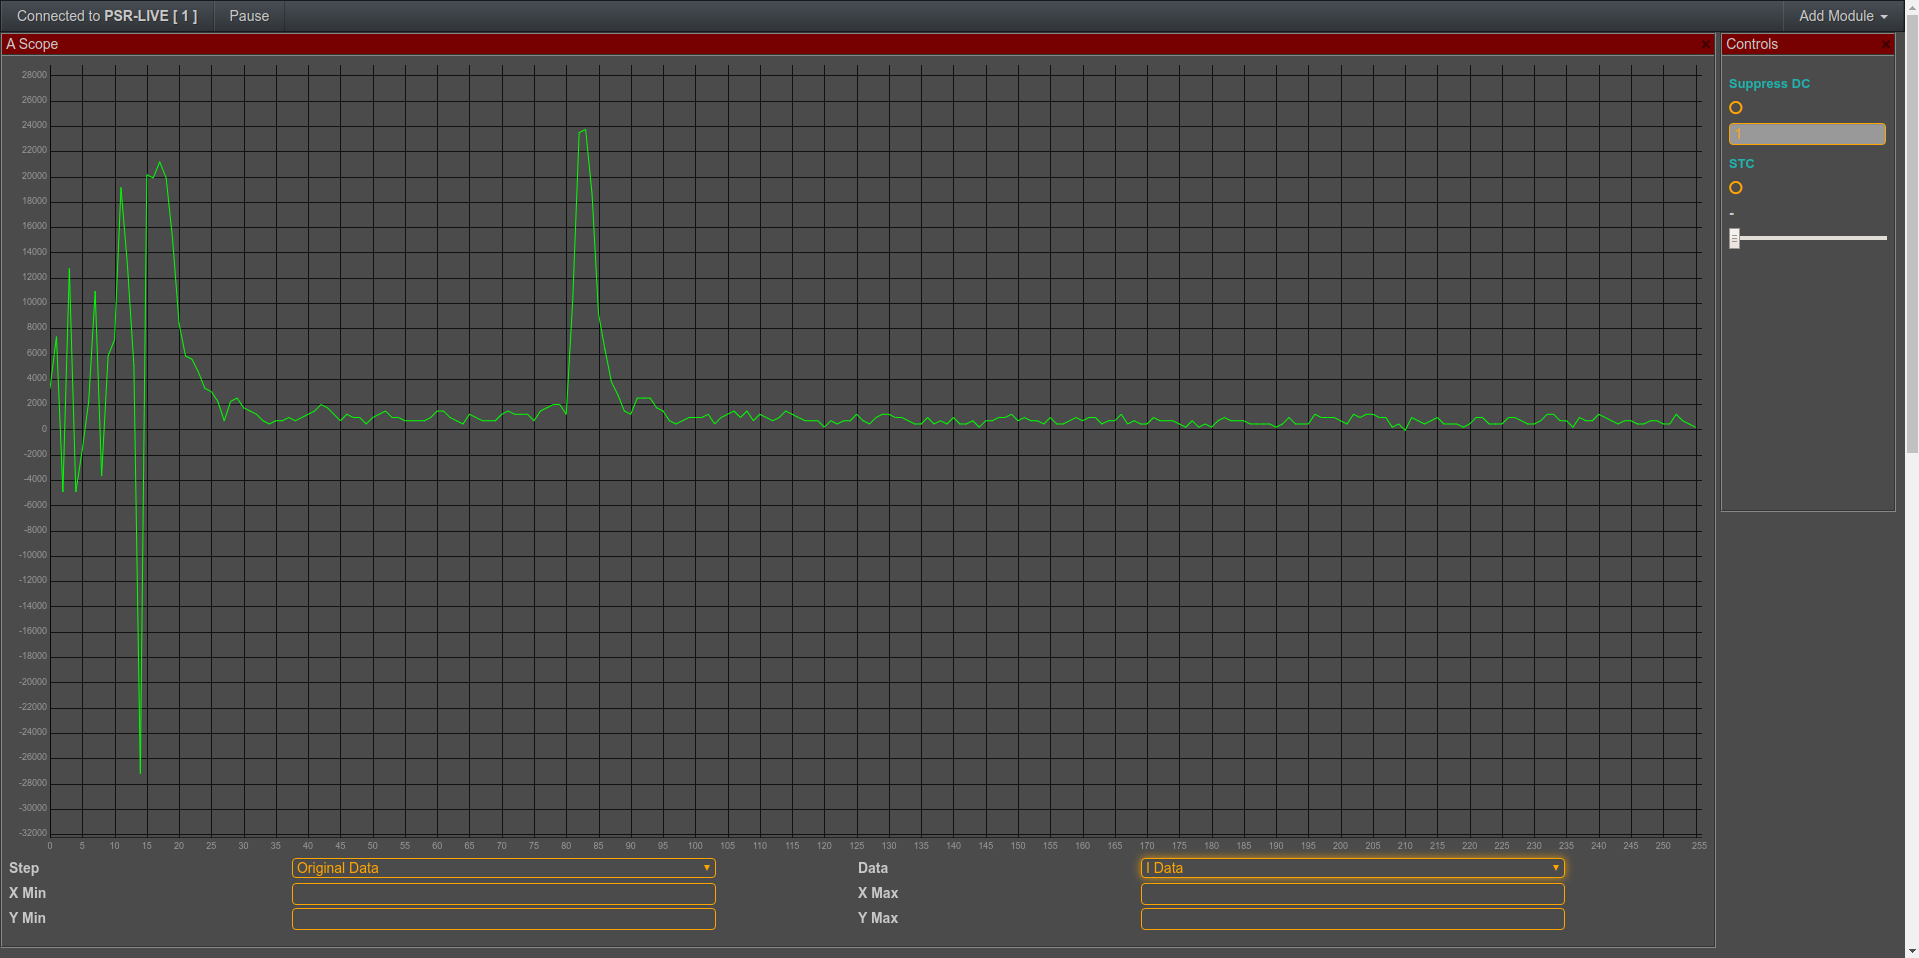
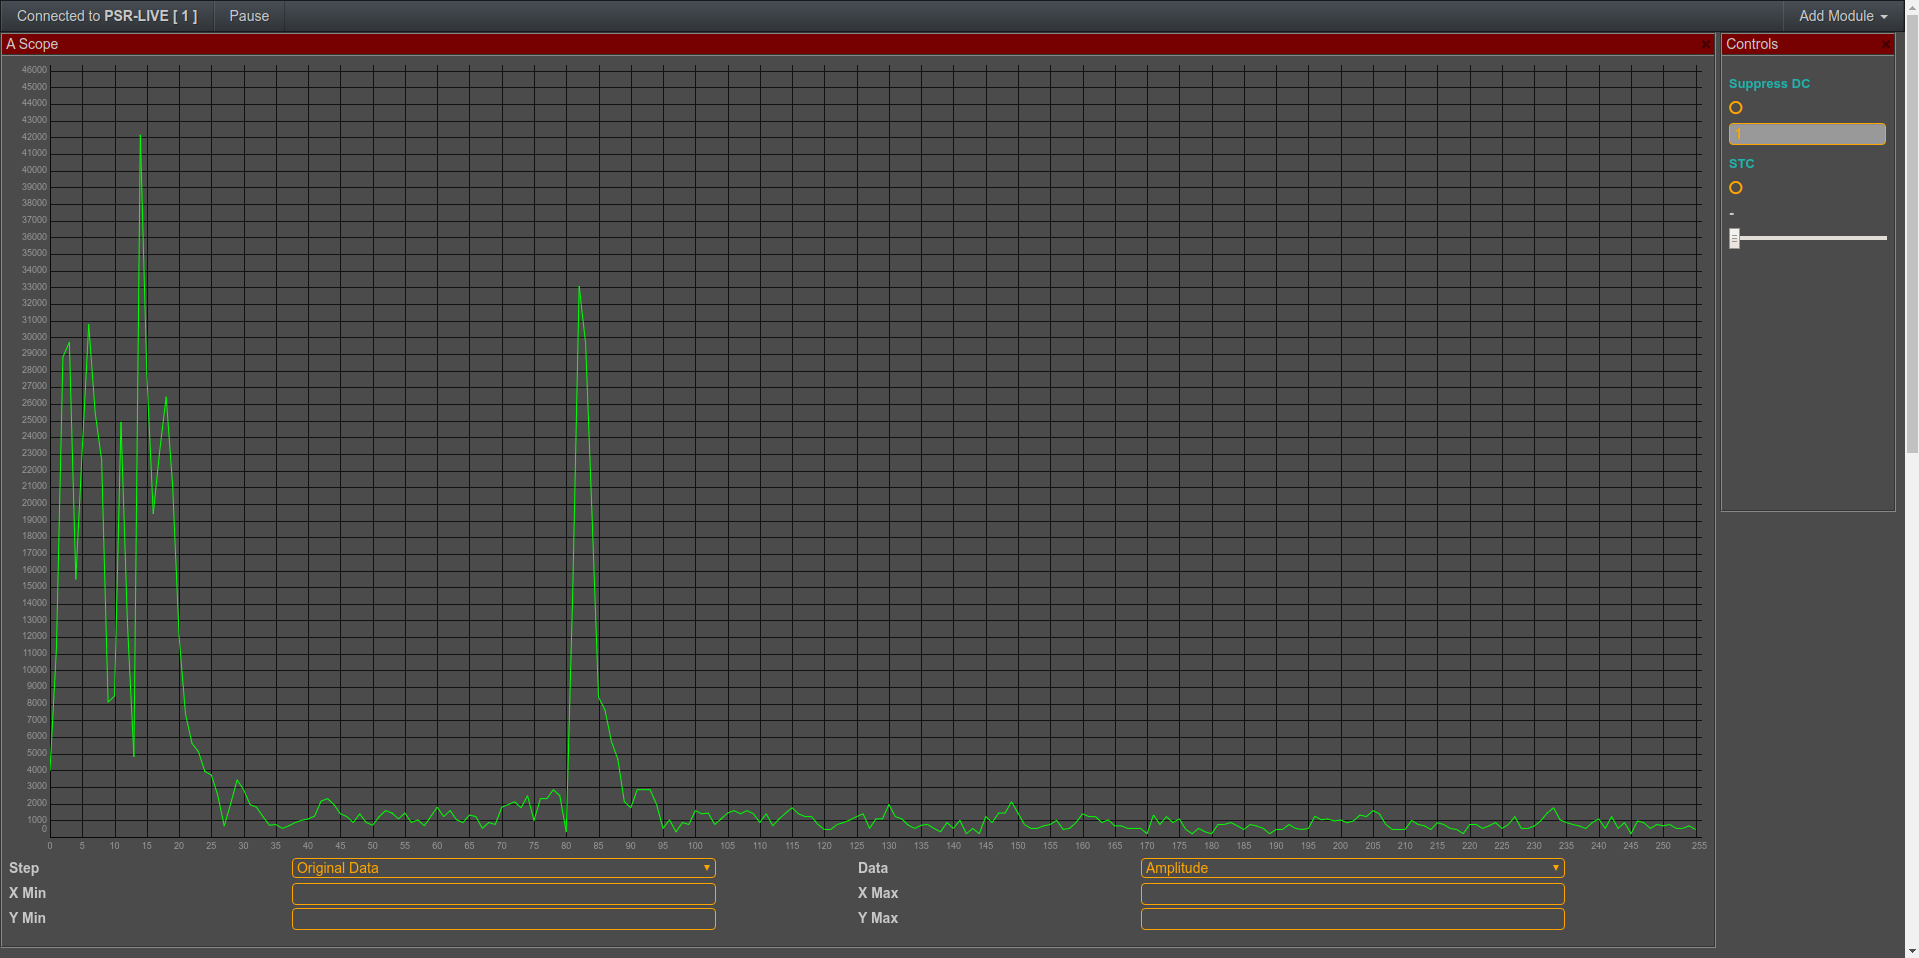
A-Scope is able to show I, Q and Amplitude data. I Data is selected here.
A-Scope shows Q Data here.
Multiple instances of Scopes

It's possible to add multiple instances of same module. For example two A-Scopes that one shows Amplitude and the second shows Q Data.
Showing different processing steps
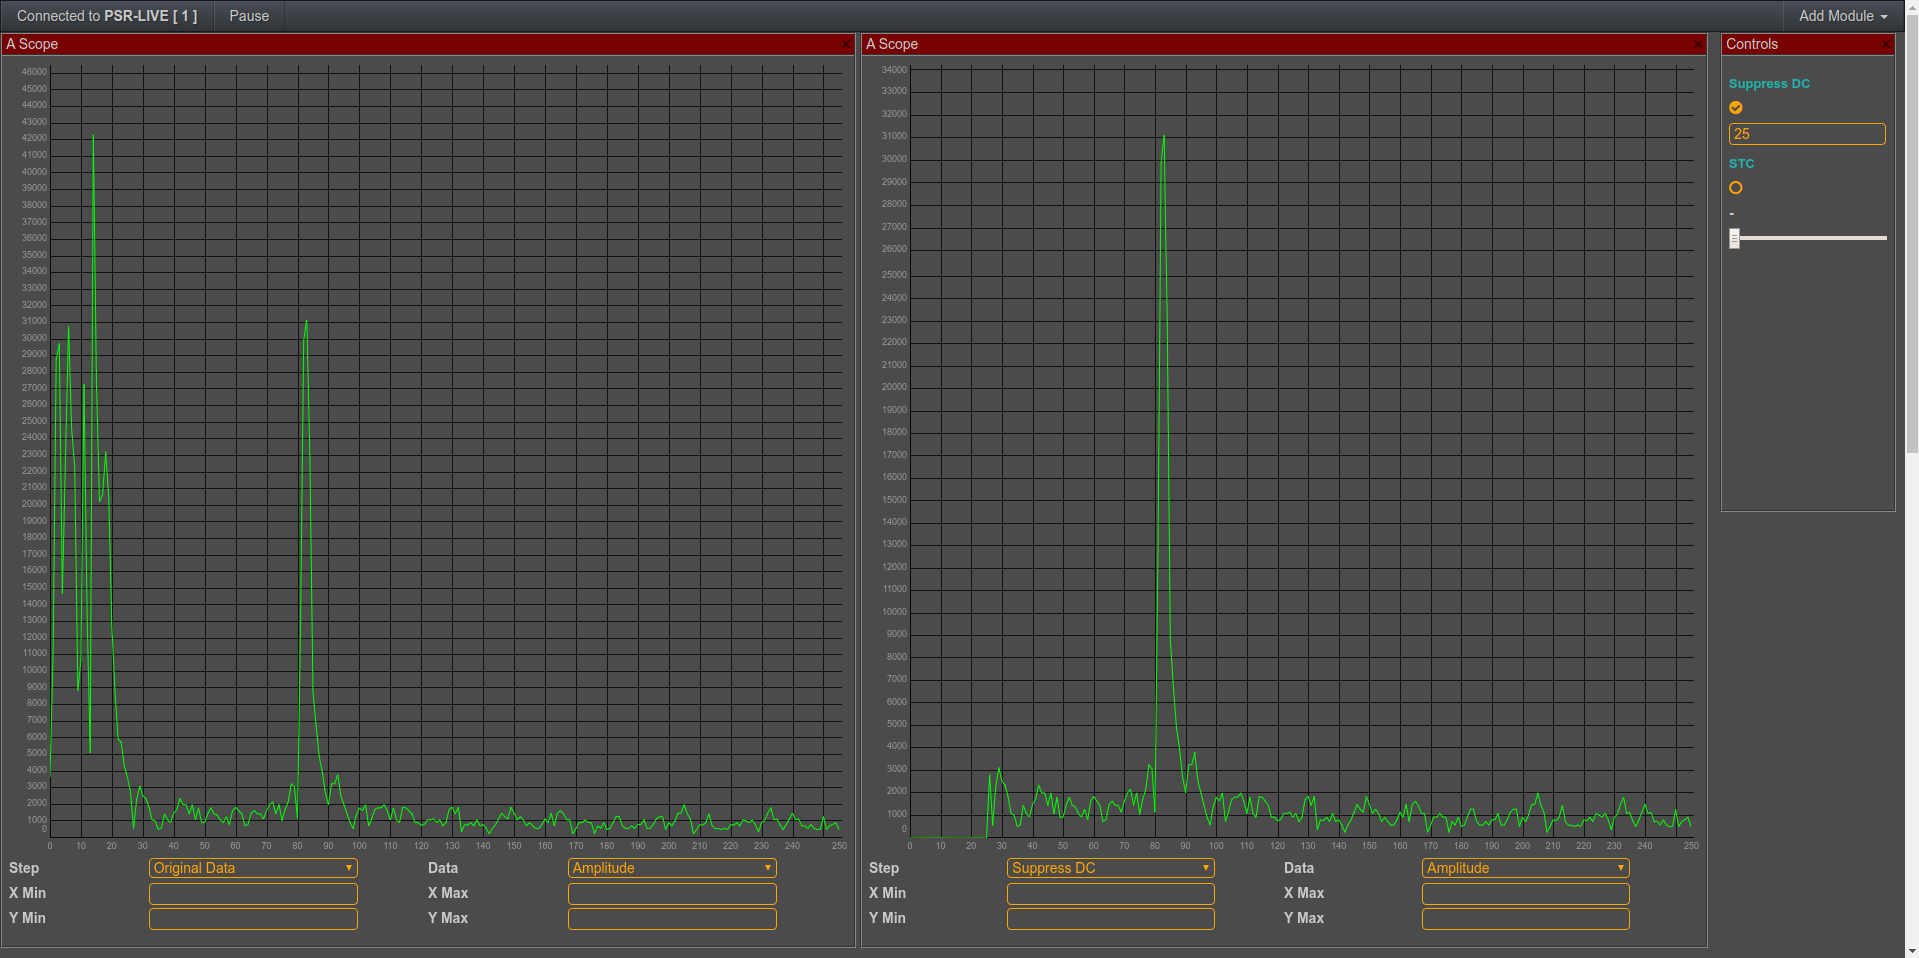
A-Scope is also able to show different processing steps. For example left shows Original Data and right shows signal after suppressing 25 samples from first. We can see that max value of Y axis is automatically adjust to 46000 left and 34000 right.
Calibrating the X-axis of the A-Scope
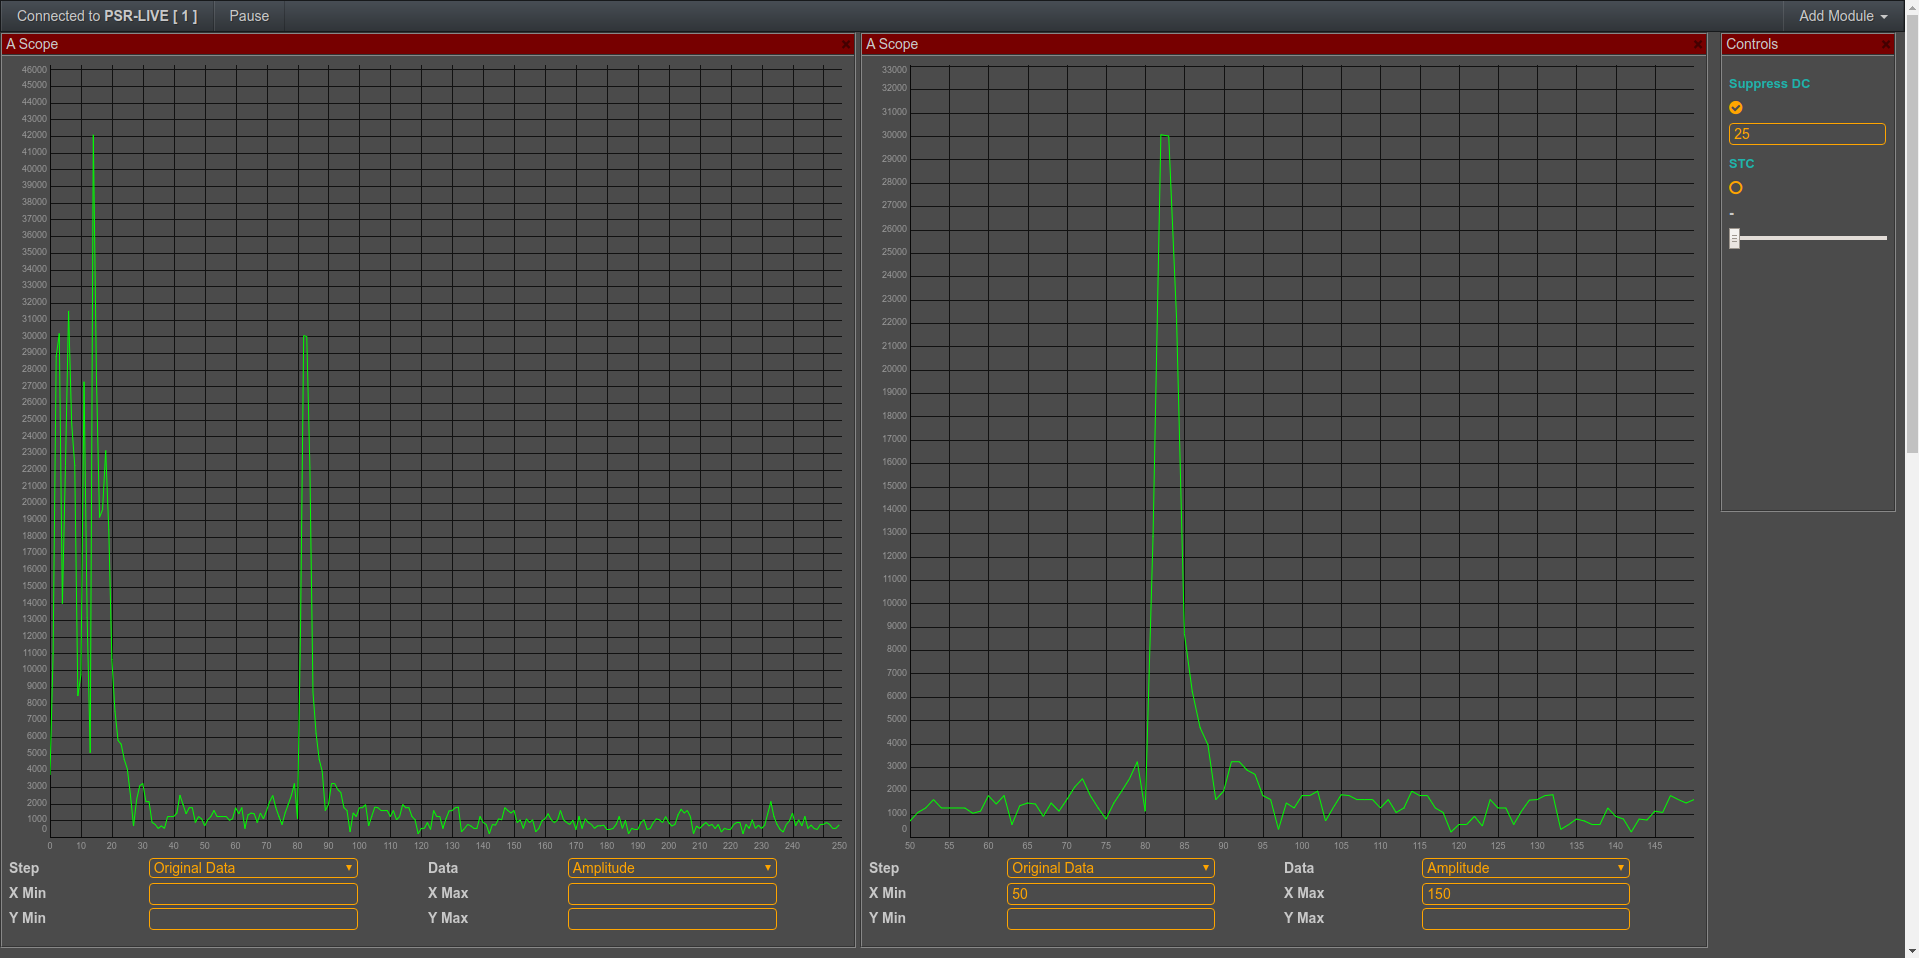
We have control on X axis range of A-Scope. Here at right it's limited to only show 50 to 150, while left shows all samples.
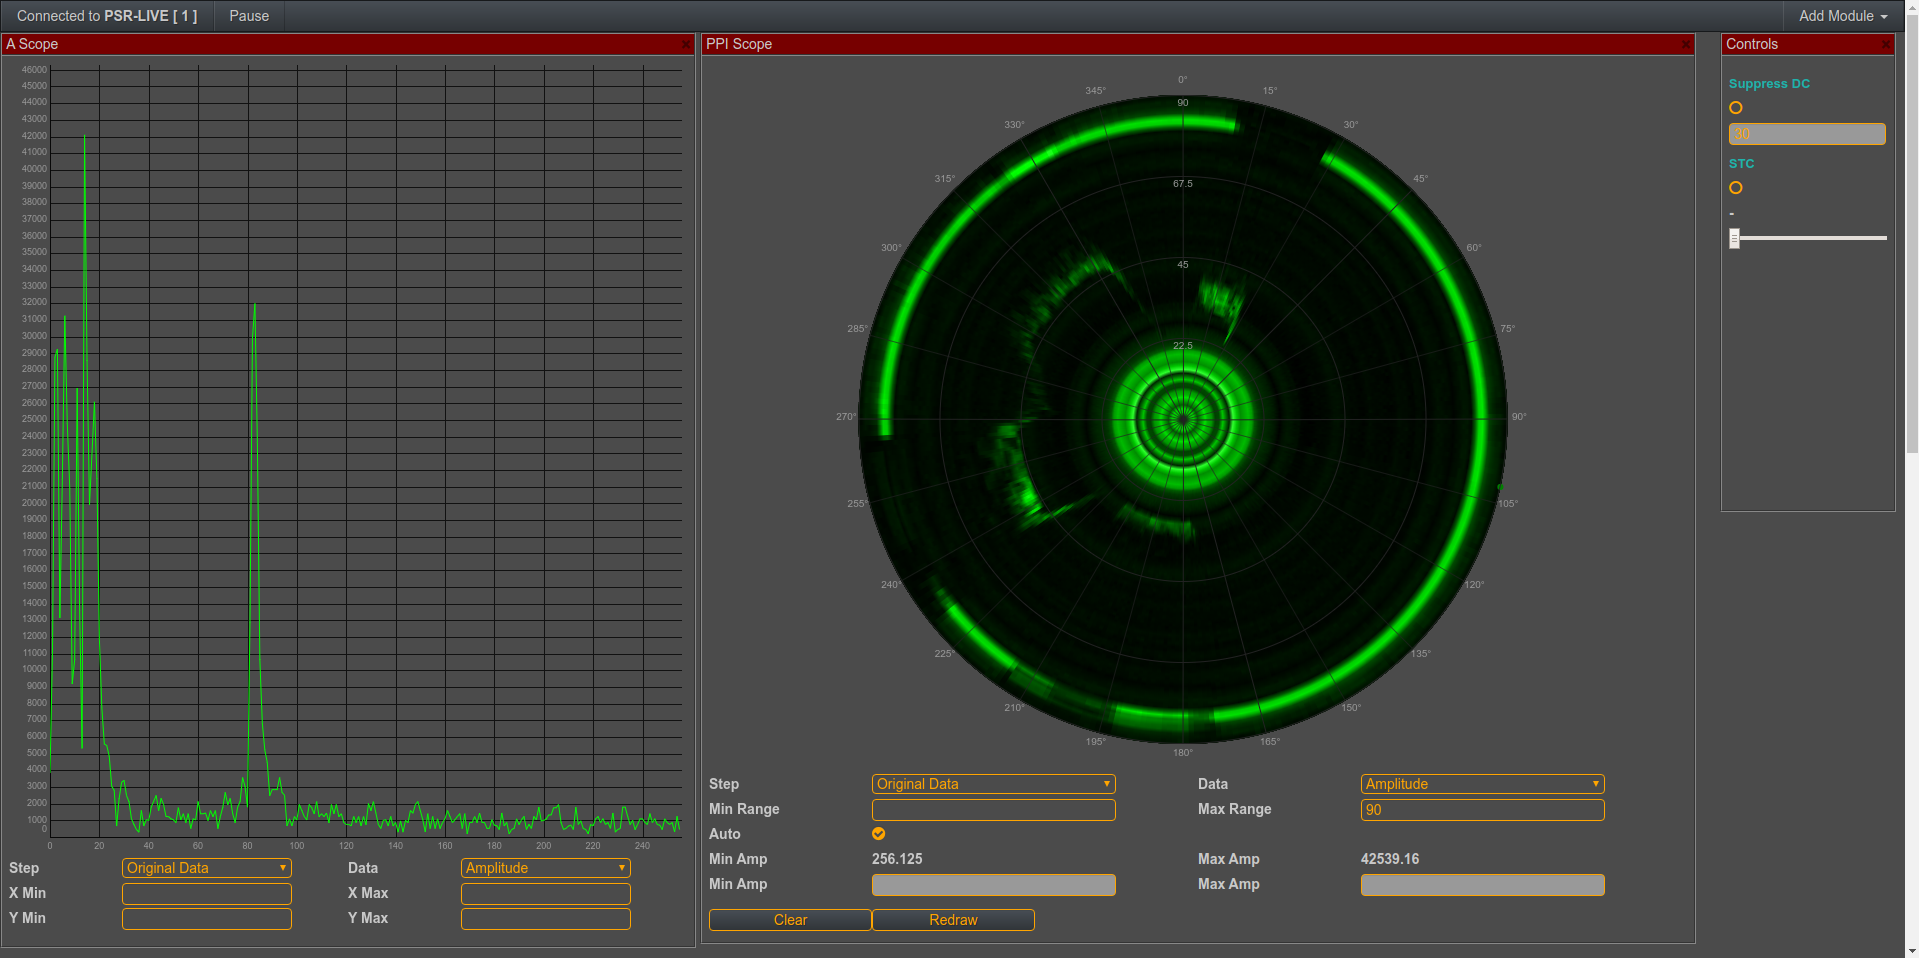
Sensitive Time Control

Continuing the calibration, we can select in the drop-down of A-Scope the Sensitive Time Control STC. It shows the result of STC filter. We need to enable it and adjust its value. Here we can see that how STC reduced the amplitude of near distances, while amplifying far distances.
Adding a B-Scope
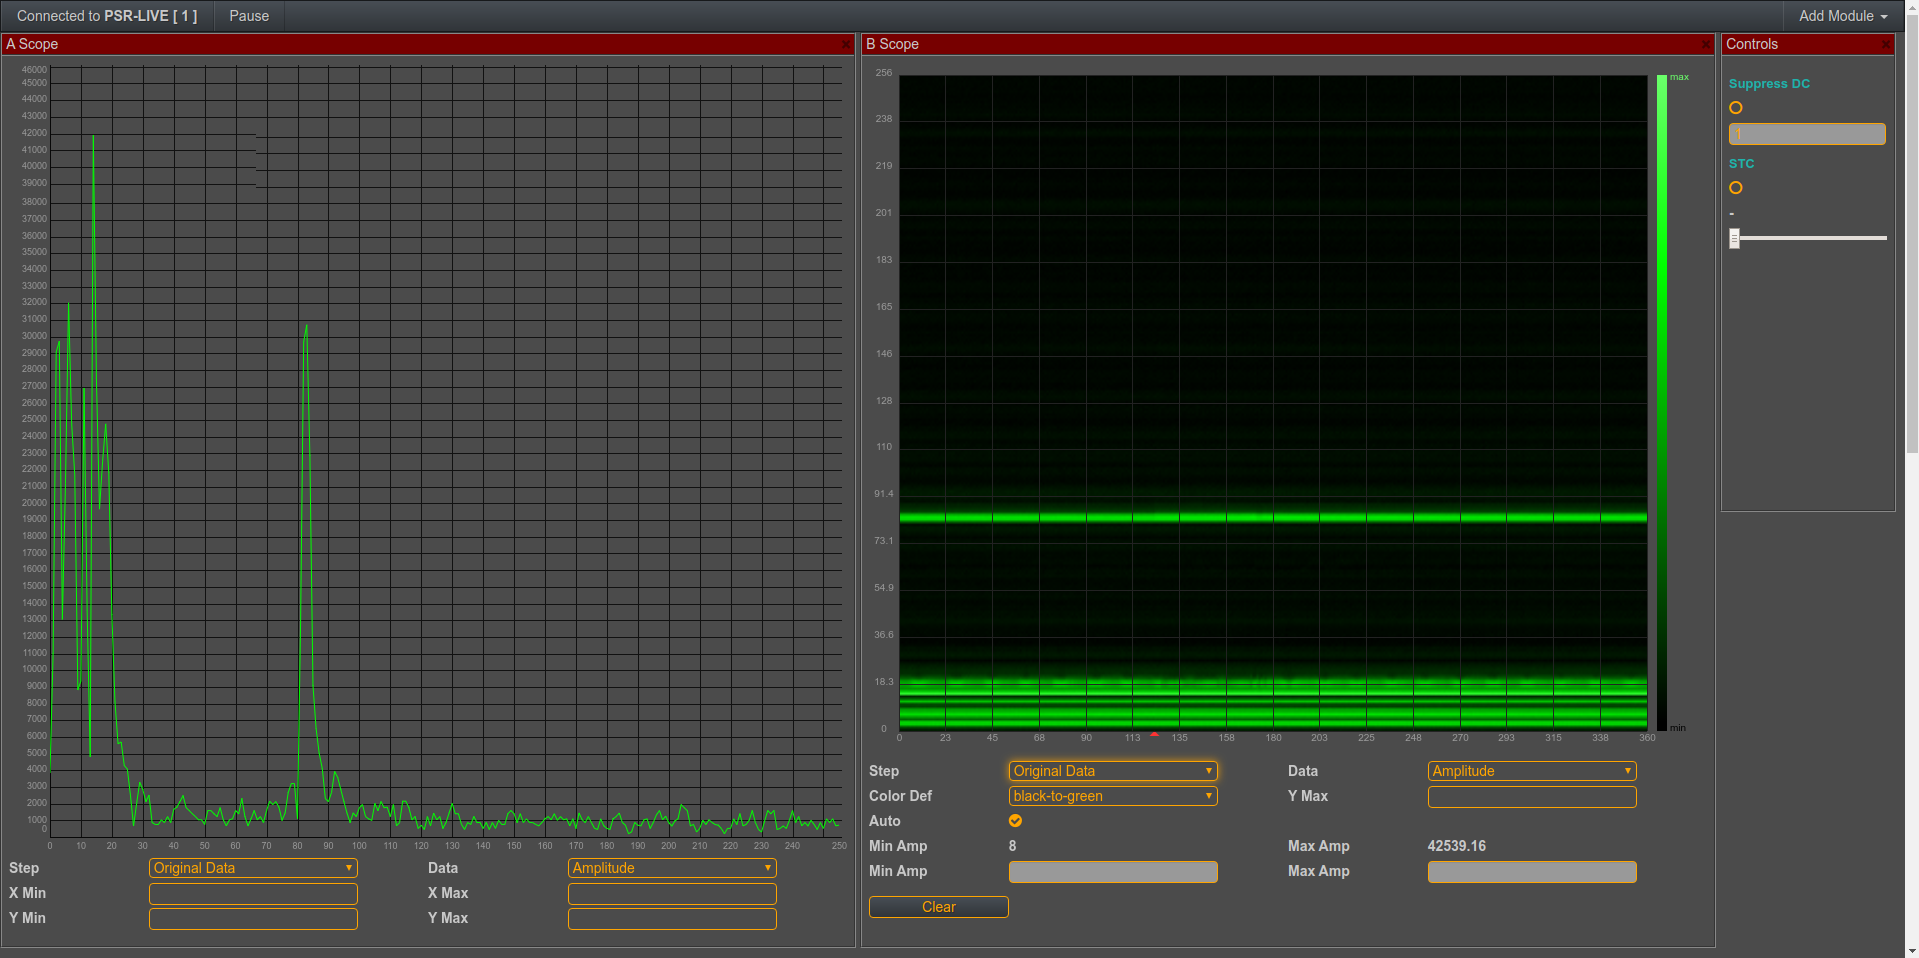
Another module that we can add from Add Module menu is B-Scope. Here we see same data on A-Scope and B-Scope. B-Scope shows data from 0 to 360 based on the current compass of motor.
Zooming into the B-Scope
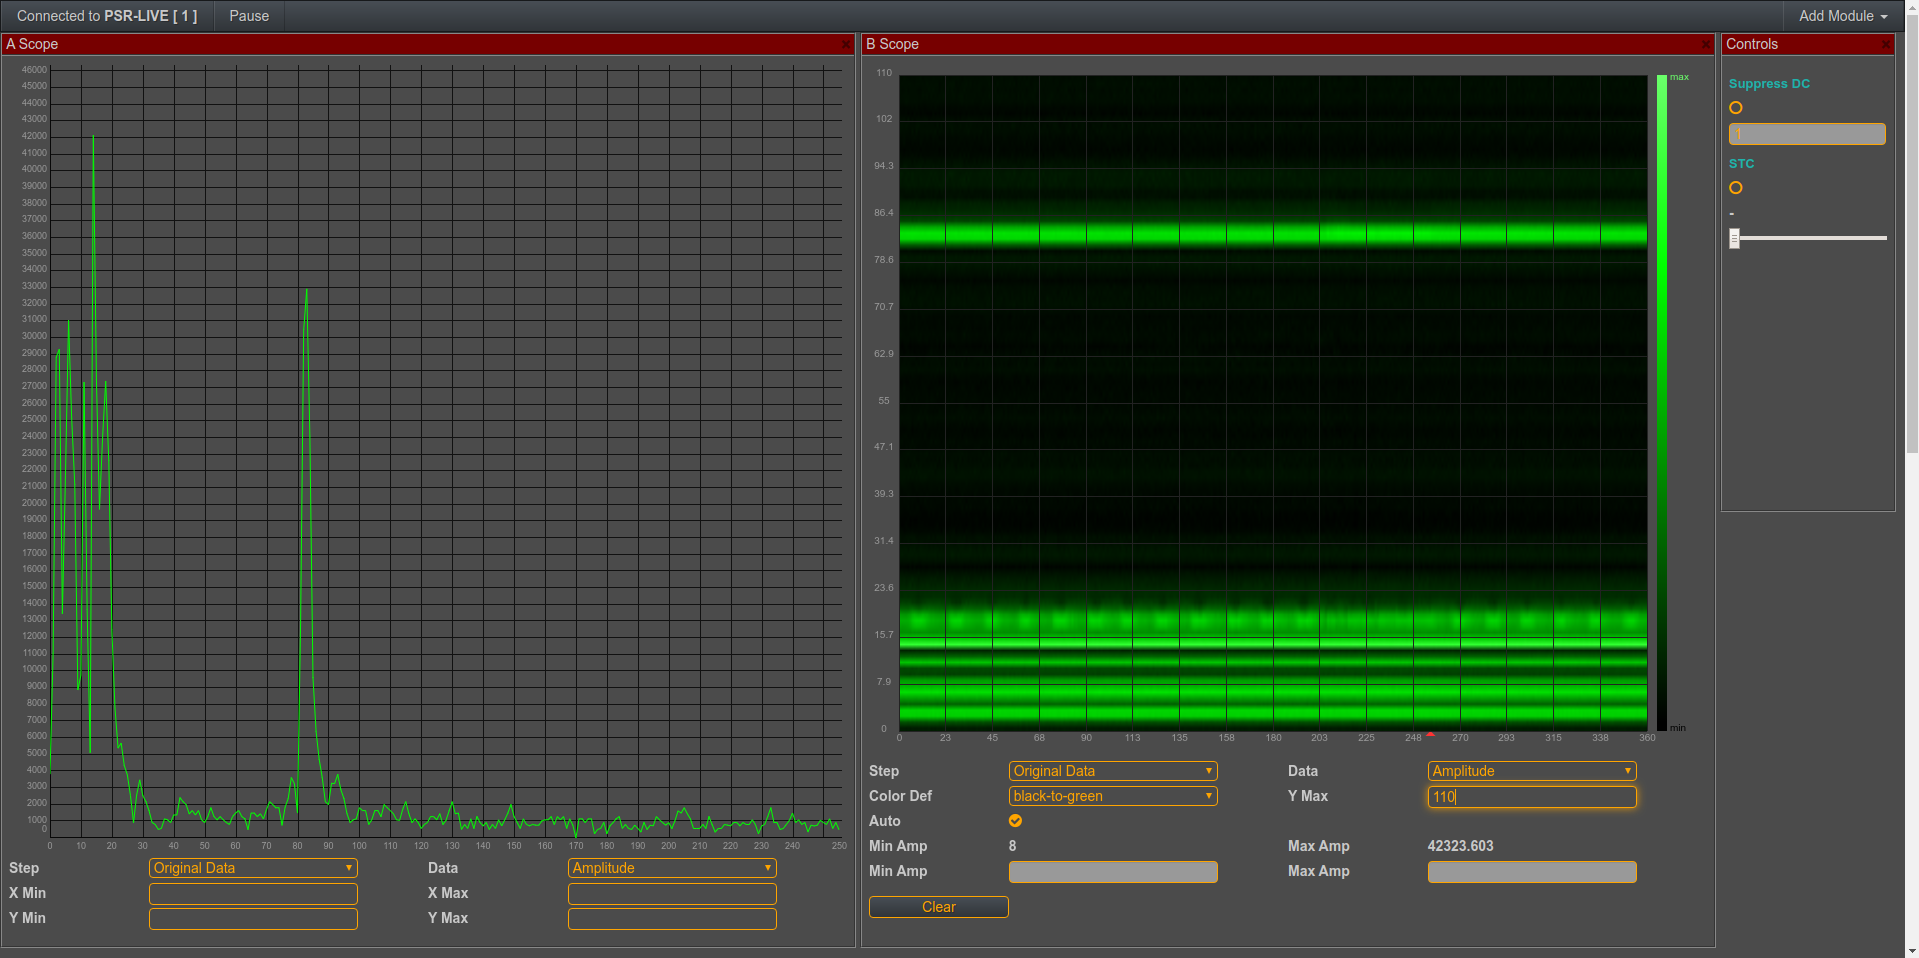
It's possible to zoom in B-Scope by setting Y Max value.
B-Scope and Amplitude Coloring
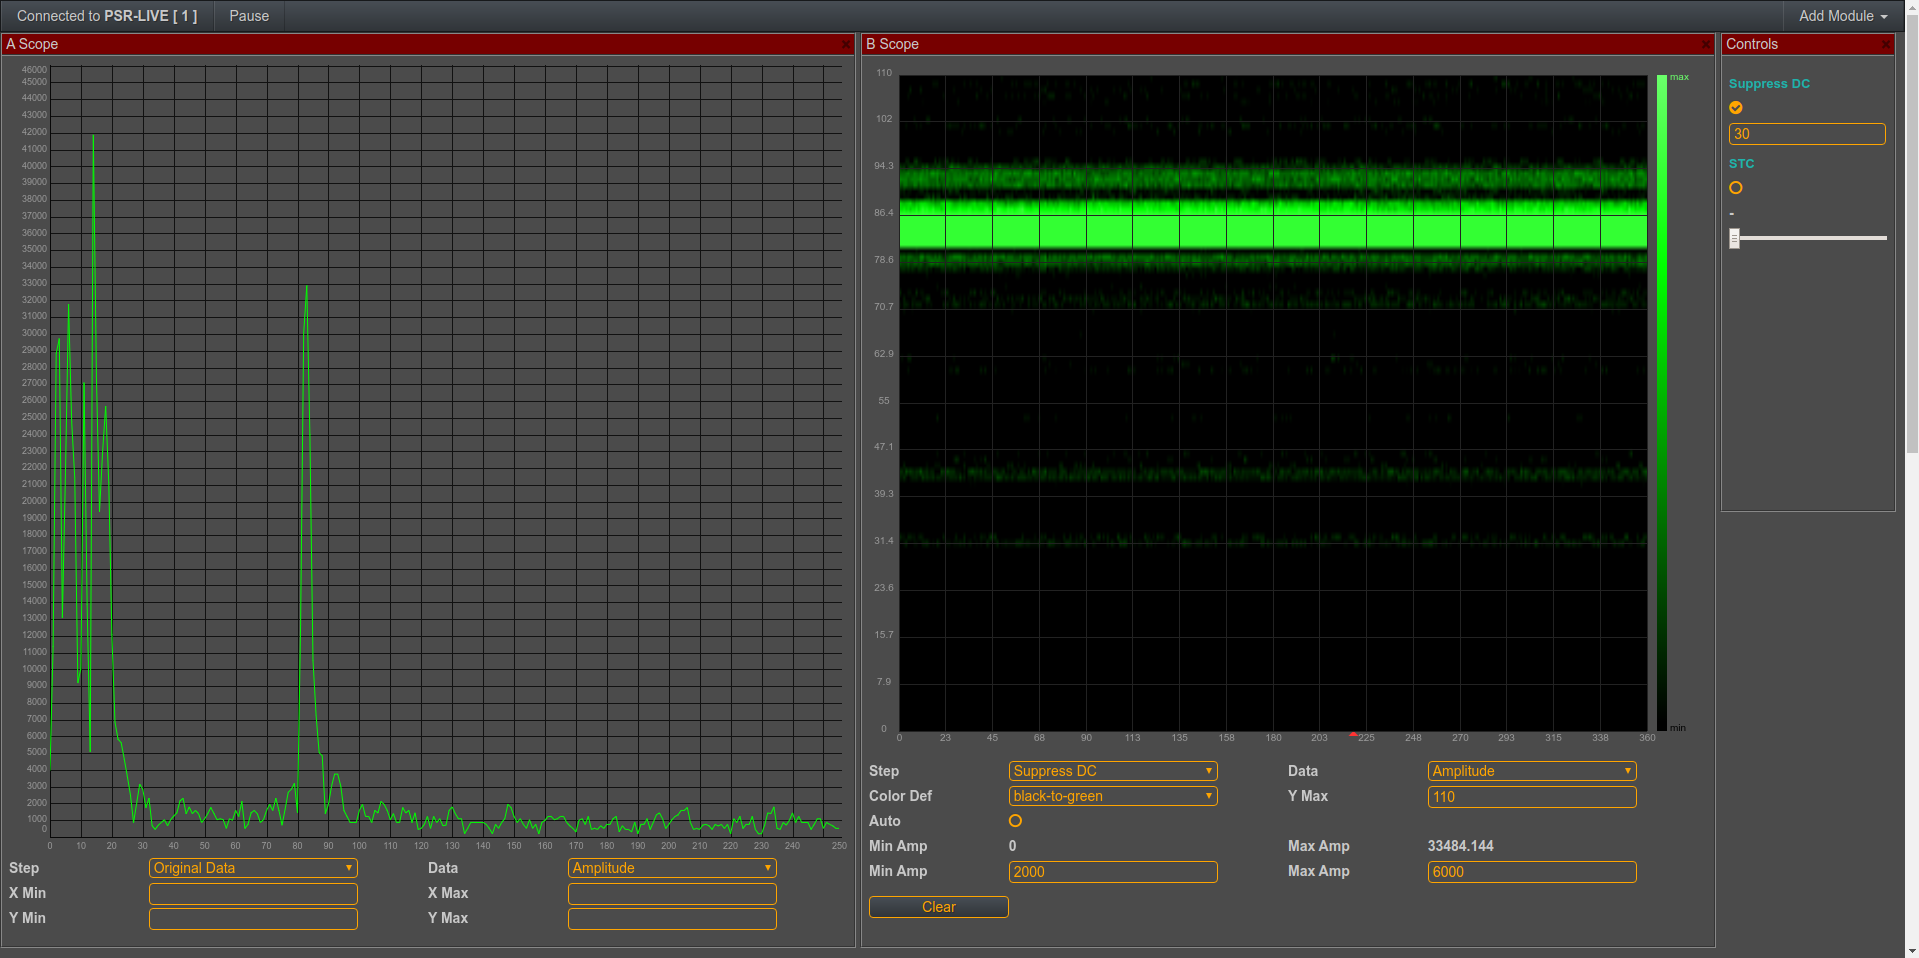
B-Scope normally adjust amplitude coloring, but you can control it manually also. Here we set min=2000 and max=6000.
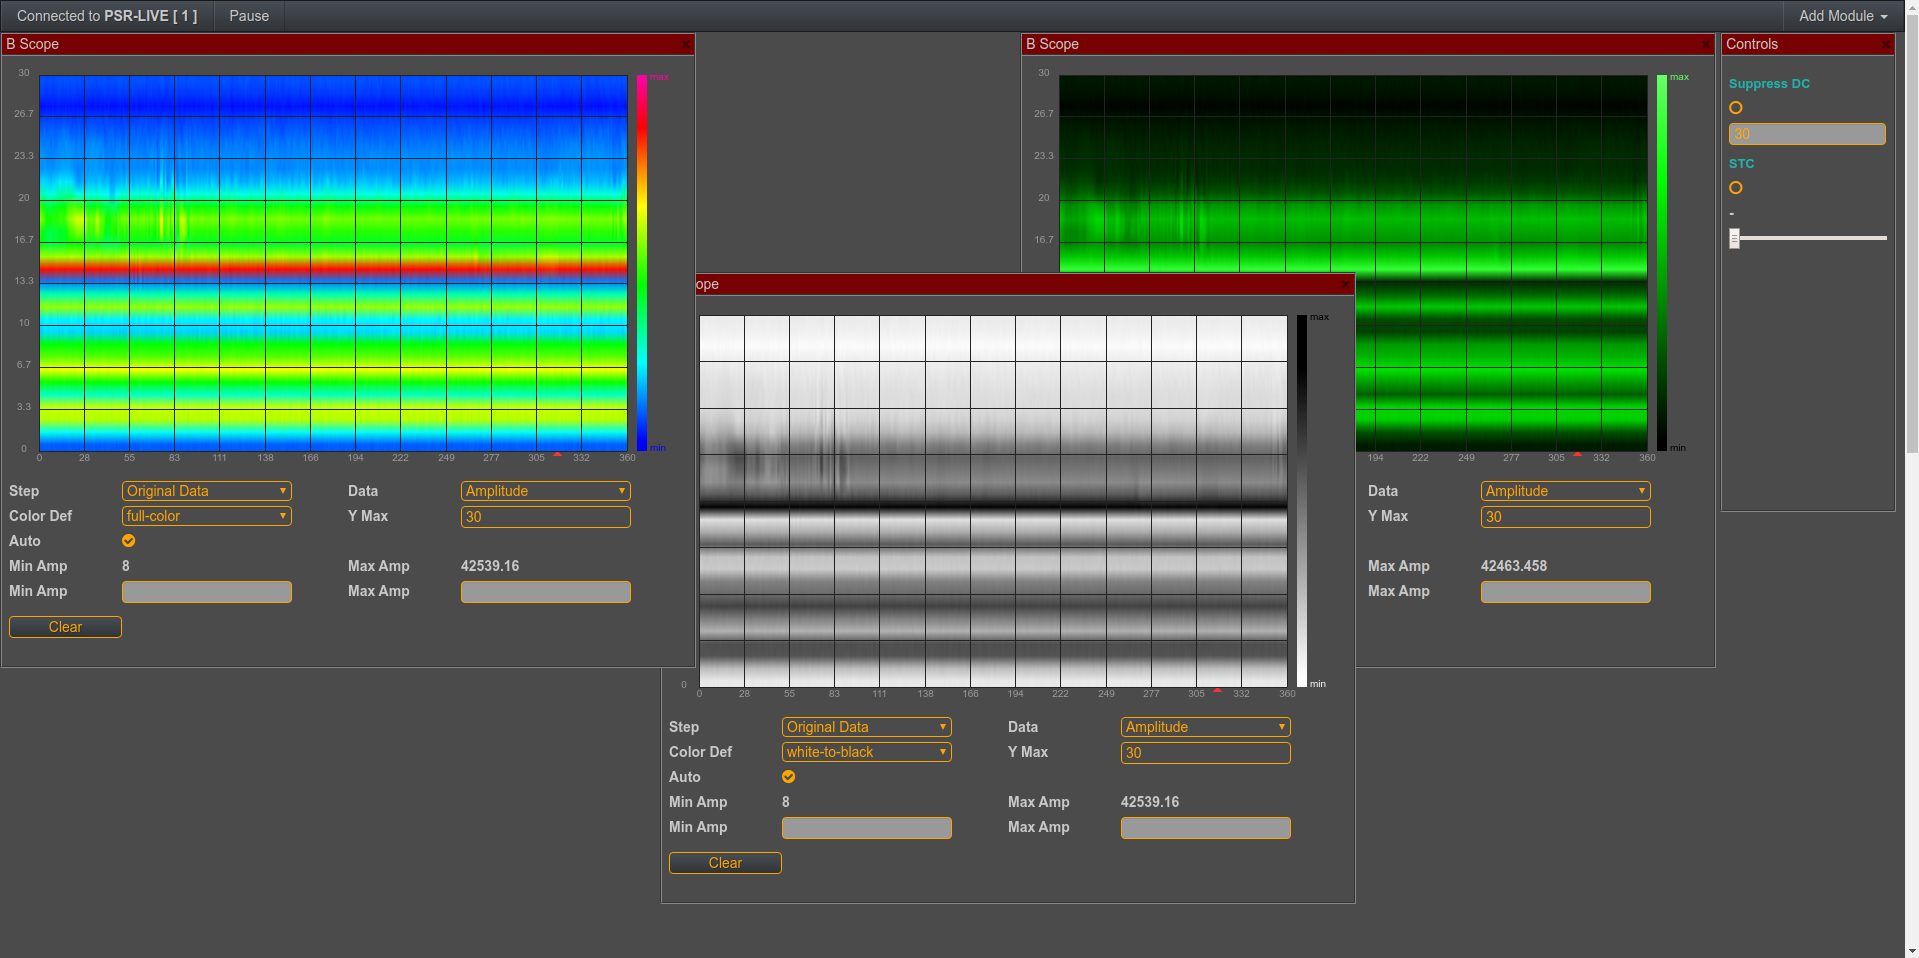
It's also possible select different coloring schema for each B-Scope module. Sometimes a specific schema may give a better clarity.
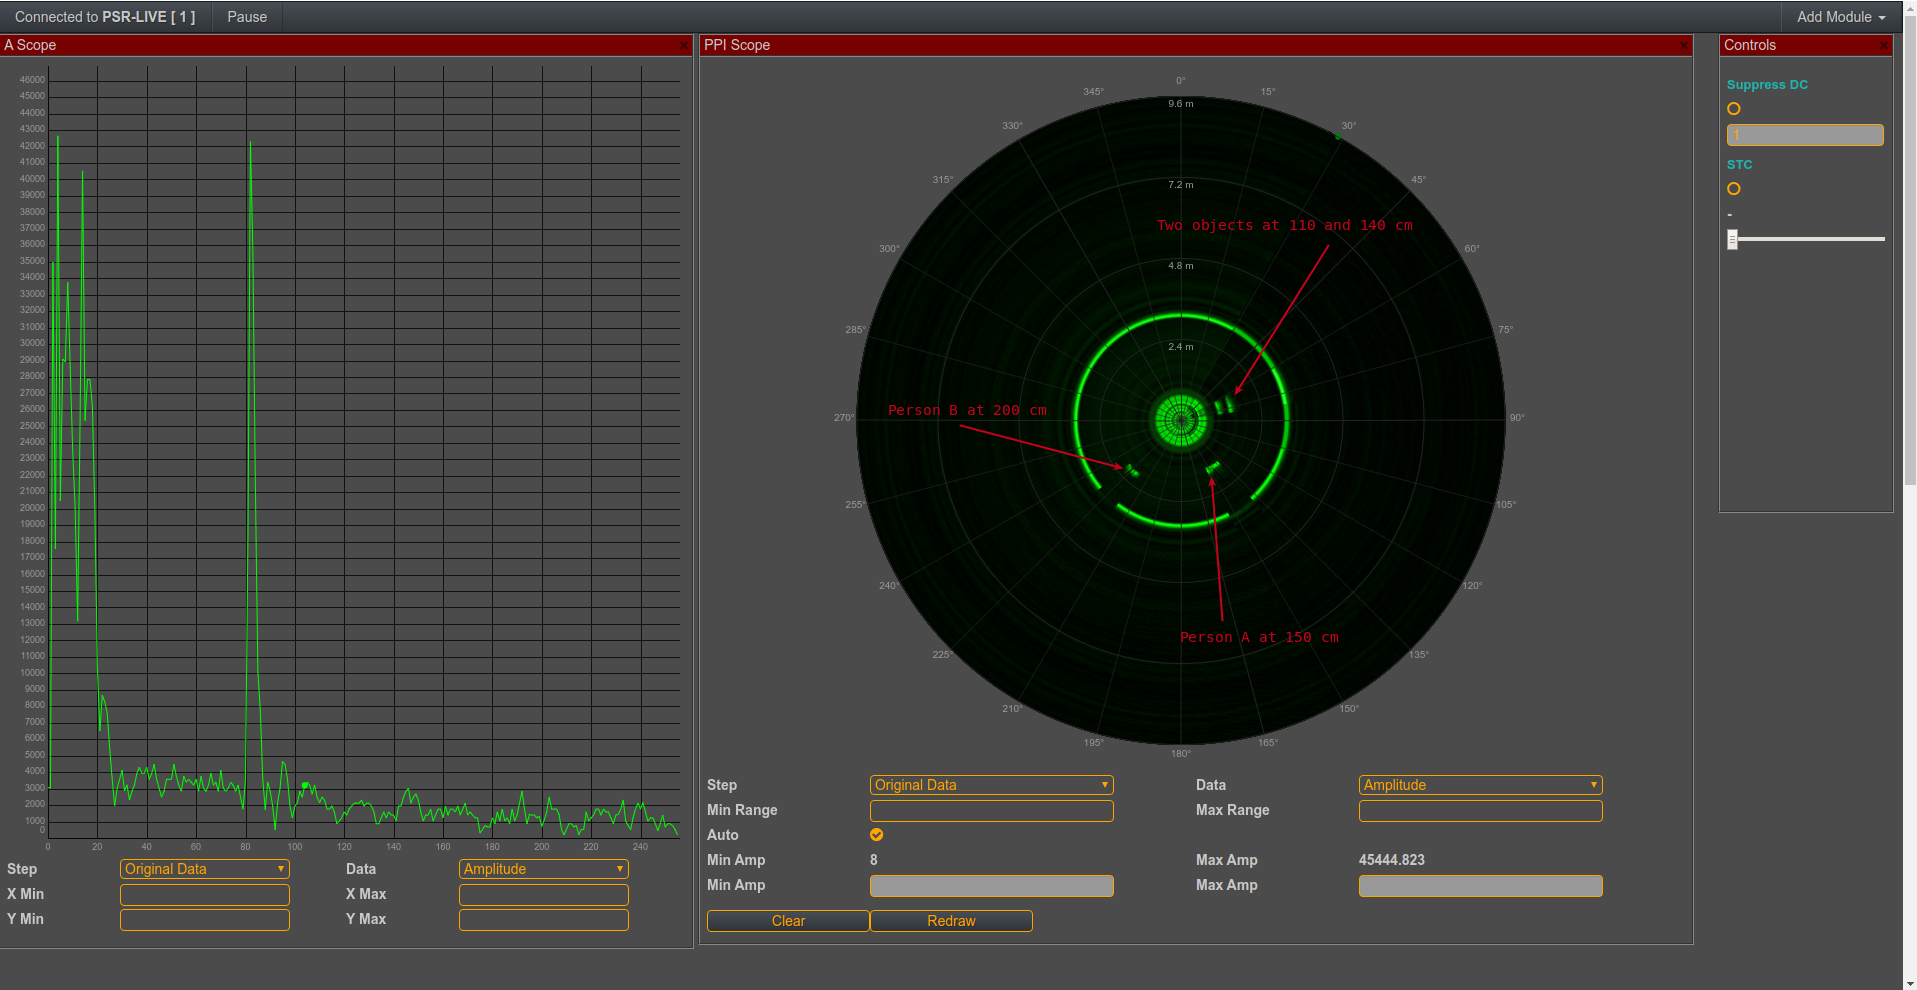
Plan Position Indicator PPI
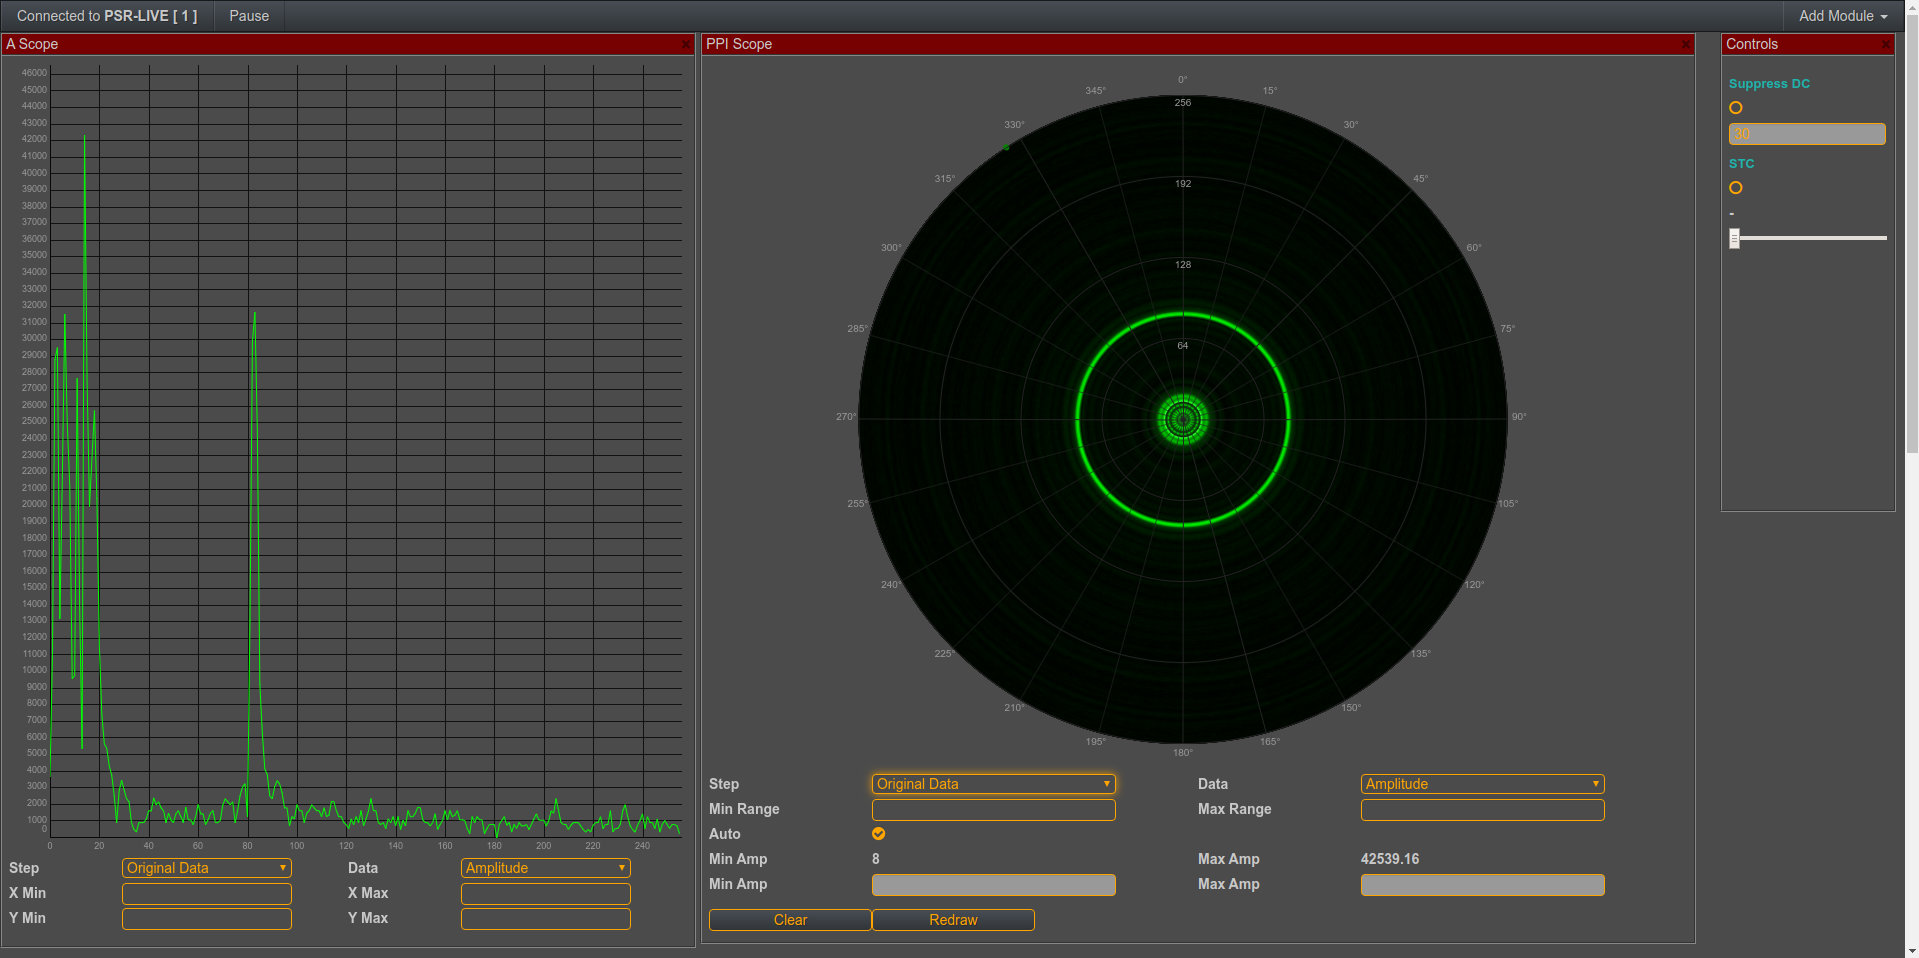
And we can add PPI-Scope from the Add Module menu. It's possible to select and show different processing steps in PPI, also showing I, Q or Amplitude data, is possible.
Zooming into the PPI
We can zoom in PPI by setting Max Range value, or adjusting amplitude manually (like B-Scope). Here we can see different targets in PPI.
Endless Options
It is impossible to show all options. There is no alternative to trying it out ...
Superusers - Controlling the Radar-Hardware
Hundreds of users can receive the signal and apply their filters and processing on it independently. But only one superuser can control the hardware.
This is really important! Imagine all students had equal rights of controlling the hardware, turning panning or rotation on and of etc. A targeted learning process would be impossible.
How to Choose the Right Computers for the SkyRadar Lab?
One of the advantages of the SkyRadar solutions is that an unlimited amount of learners can access the radars concurrently via the customers Intranet or even Extranet. A simple LAN solution works. But what computer to choose to get the maximum benefit from the SkyRadar products?
In principle any recent computer and computer screen works. But if you choose the lower end, you risk slow processing, pixelated visualisation, perturbed colors, etc. Better get it right, as no other training radar solution has a better quality-per-cost ratio per working position as SkyRadar - so do not save money at the wrong end, you already made the most economical choice.
SkyRadar uses its HTML5-based client app FreeScopes to interact with and to visualize all data. There is no local installation required, just an intranet-based connection to the CloudServer or the radar.
Perfect benefit depends on the following parameters, which will be explained in detail below:
- Browser
- CPU
- RAM
- Hard Disk
- Display
Choose the right Browser
In principle all HTML5 browsers should do. But we suggest to use Google Chrome. It is free, and always the fastest when it comes to implementation of recent HTML5 standard updates. Mozilla, which is run by a foundation, is also good but not always fast enough in implementing updates.
Microsoft and Apple browsers are a bit trickier. They often run some more or less hidden vendor-lock-in strategies. They are not always HTML5 compliant and include proprietary features which might perturb your learning experience. Microsoft Edge appears to be quite ok, but you never know what the people at Microsoft decide in the future. But please get rid of MS Internet Explorer - it is completely outdated by now.
So stay clean, go for Chrome.
Get a Good CPU
Choose one of the models with 4 digits which we list hereafter, for example i7-5950HQ, i7-4910MQ, etc.
In the following we use nnnn as a placeholder.
Please note that CPU is the most effective part for SkyRadar client app FreeScopes.
Core i5 or i7 alone or GHz will not specify the power of CPU, the main characteristic is CPU model. This by the way is generally good to know when you buy a new computer!!!
These models are OK:
- Intel Core i9-*
- Intel Core i7-nnnnHQ
- Intel Core i7-nnnnXM
- Intel Core i7-nnnnX
- Intel Core i7-nnnnS
- Intel Core i7-nnnnEQ
- Intel Core i7-nnnnQE
- Intel Core i7-nnnnMQ
- Intel Core i7-nnnnQM
- Intel Core i7-nnnnK
- Intel Core i7-8nnnU
- Intel Core i5-nnnnS
- Intel Core i5-nnnnK
- Intel Core i5-nnnnHQ
- Intel Core i5-nnnnEQ
- Intel Core i5-8nnnU
You may alternatively choose any model from this list where the benchmark value is above 6000.
Get Enough RAM
SkyRadar solutions send the raw IQ data to each client computer. Most calculations are processed in the FreeScopes app. That gives every student the freedom to independently conduct his or her own experiments. You may imagine that running a Fast Fourrier Transform or a SAR calculation in your browser requires quite a lot of virtual memory. Choose 8 GB or more and you are on the safe side. Generally we say: the more the better. Always be prepared for some great SkyRadar updates. And remember complex mathematics are our best friend :-) hidden in the browser, so you do not need to bother with it.
Hard Disk
Your IT service people have better things to do than cleaning up hard disks from whatever students put there. We could write a book on what we found there. We do only need a small configuration of the proper firmware and browser operations. Specs are not important to us. Any HDD or SSD with any size is OK.
Display
Let us come to the fun part of it. Could you imagine watching the movie Star Wars on a little display. OMG no. Same with the great SkyRadar visualizations and simulations. Be a friend to your students eyes. And have then enjoy the A-Scopes, B-Scopes, PPI-displays etc. Go at least 17" monitor. If you have a ready equipped laboratory or laptops with 15" displays is also does the job. But don't blame it on us if your students will not love you for that.
Once you have some budget left, get them some 17" displays or bigger - and the force will be with you ...
In need of more?
It is impossible to squeeze all features into one document. Perhaps some feature that you are looking for is missing. Contact us if you require an additional feature - it is probably already there.
Do you want to print out this document? No problem, just press the printer button on top of the document or simply press CTRL+p .
Enjoy!